TL;DR: Just want to buy Bitcoin and forget about it?
- Download 21Bitcoin on your phone
- Create an account and complete the identity verification (KYC)
- Go to Bitcoin → Savings → Show Deposit Details to get the bank account info
- Set up a recurring bank transfer (e.g. 100 €/month) from your bank to that account
- Done! Your euros will automatically convert to Bitcoin on each deposit 🎉
That's the quick version. Read on if you want to learn about self-custody, wallets, seed phrases, and how to truly own your Bitcoin.
Understanding Bitcoin is essential, and it is something you should continue exploring on your own. Investing in an asset you do not truly believe in often leads to losses, especially with Bitcoin. The price of Bitcoin can fluctuate at any moment due to its volatility. However, these short-term price changes do not affect its core fundamentals or intrinsic value.
This post is not about Bitcoin's fundamentals, since I have already covered that topic in the first article of this Bitcoin series: BTC 101: Why Bitcoin? Instead, the purpose here is to give you just enough information to learn how to buy your first sats directly from your phone.
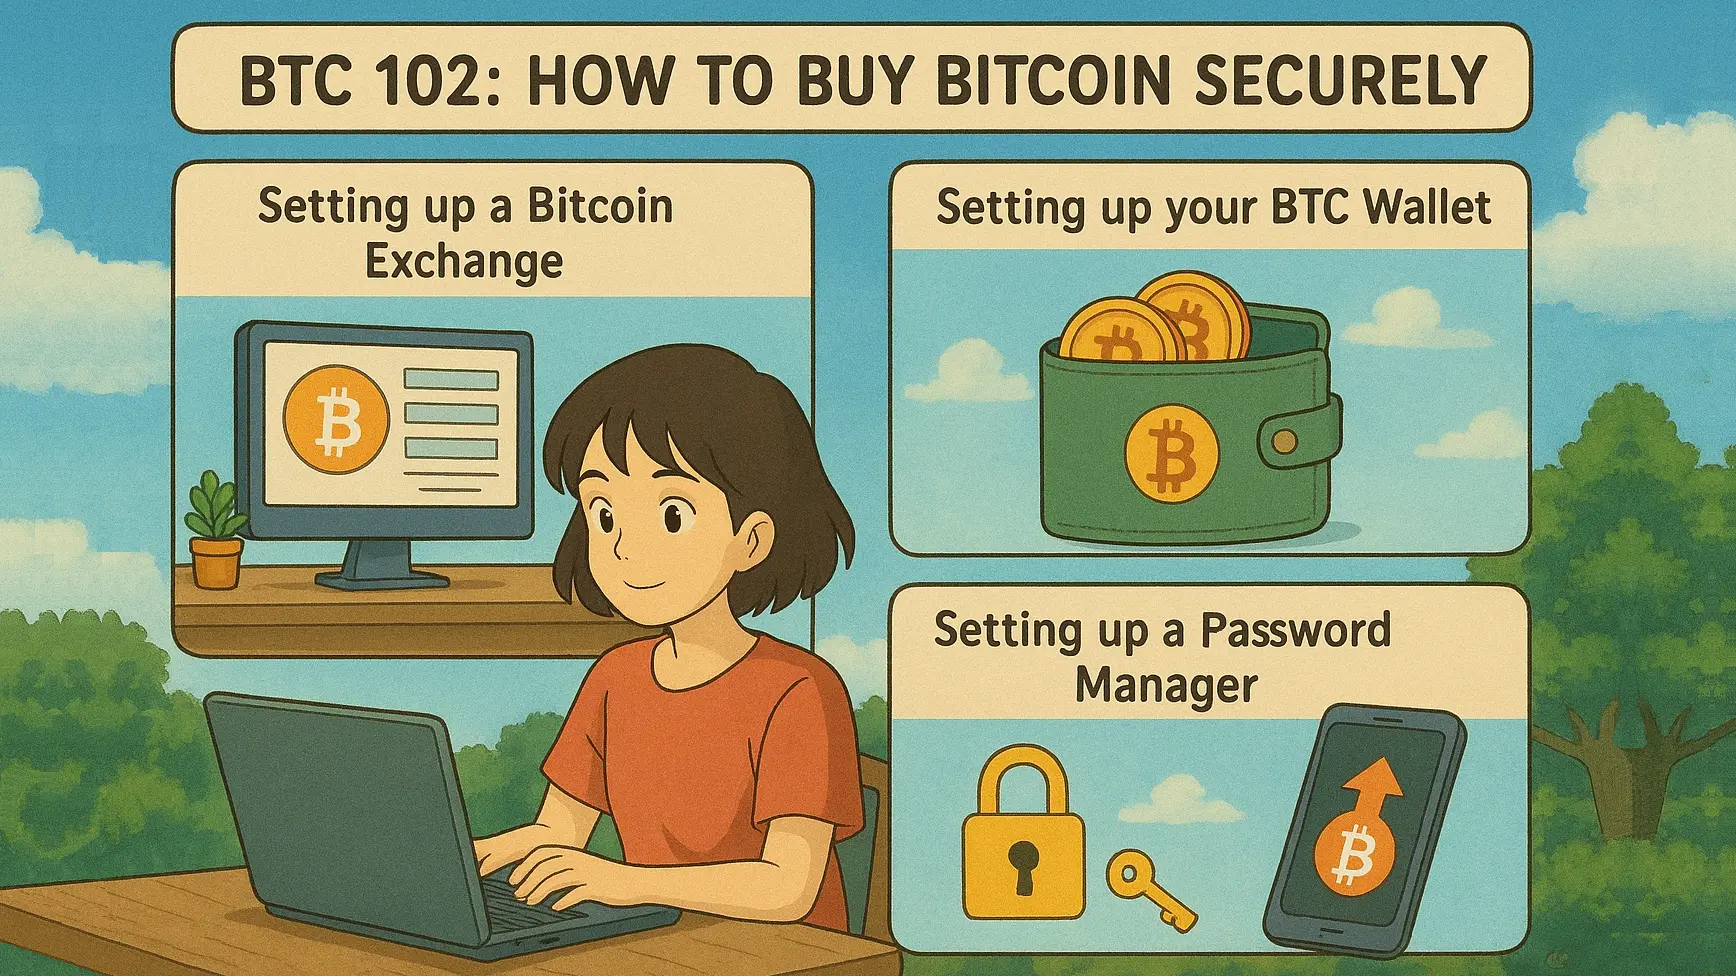
Setting up a Bitcoin Exchange
An exchange is a platform that allows you to buy or sell bitcoins (or sats, the smallest unit of Bitcoin) at current market prices. Popular platforms, such as Binance and Coinbase, are general cryptocurrency exchanges offering numerous tokens that don't align with our focus. Since we're specifically interested in Bitcoin, we'll use a Bitcoin-only exchange instead. These apps reduce distractions from other assets and provide useful features for regularly buying sats.
On your phone, install 21Bitcoin. It's slightly cheaper and faster than alternatives, and it's what I personally use. The app is designed specifically for buying Bitcoin regularly with a clean, straightforward interface. If 21Bitcoin isn't available in your region, Relai works almost identically and is a great alternative. In this guide, I will give explanations and screenshots for both apps.
There are other ways to buy Bitcoin, such as using peer-to-peer exchanges like HodlHodl, which do not require KYC (Know Your Customer). KYC is the process where you submit your ID and personal information to prove your identity. However, Bitcoin is fundamentally about financial privacy, and KYC exchanges (like Binance, 21Bitcoin, and Relai) contradict this philosophy as these apps store the personal information of those who have purchased or sold sats. However, these KYC exchanges are much easier to navigate as beginners, and starting off with one of them is a reasonable tradeoff. As you gain experience, you can explore no-KYC options like peer-to-peer platforms to better protect your privacy.
A Long-Term Mindset
If you are looking for a shortcut to be rich, Bitcoin is not for you. However, if you are willing to look at Bicoin as a long-term way to save, you are already on the right track!
The most proven approach is to consistently purchase small amounts over time through a strategy called dollar-cost averaging (DCA), and allow time and patience to grow your holdings.
Configure the Exchange
After installing the exchange, complete the KYC (ID and personal info). The account approval usually takes a few days.
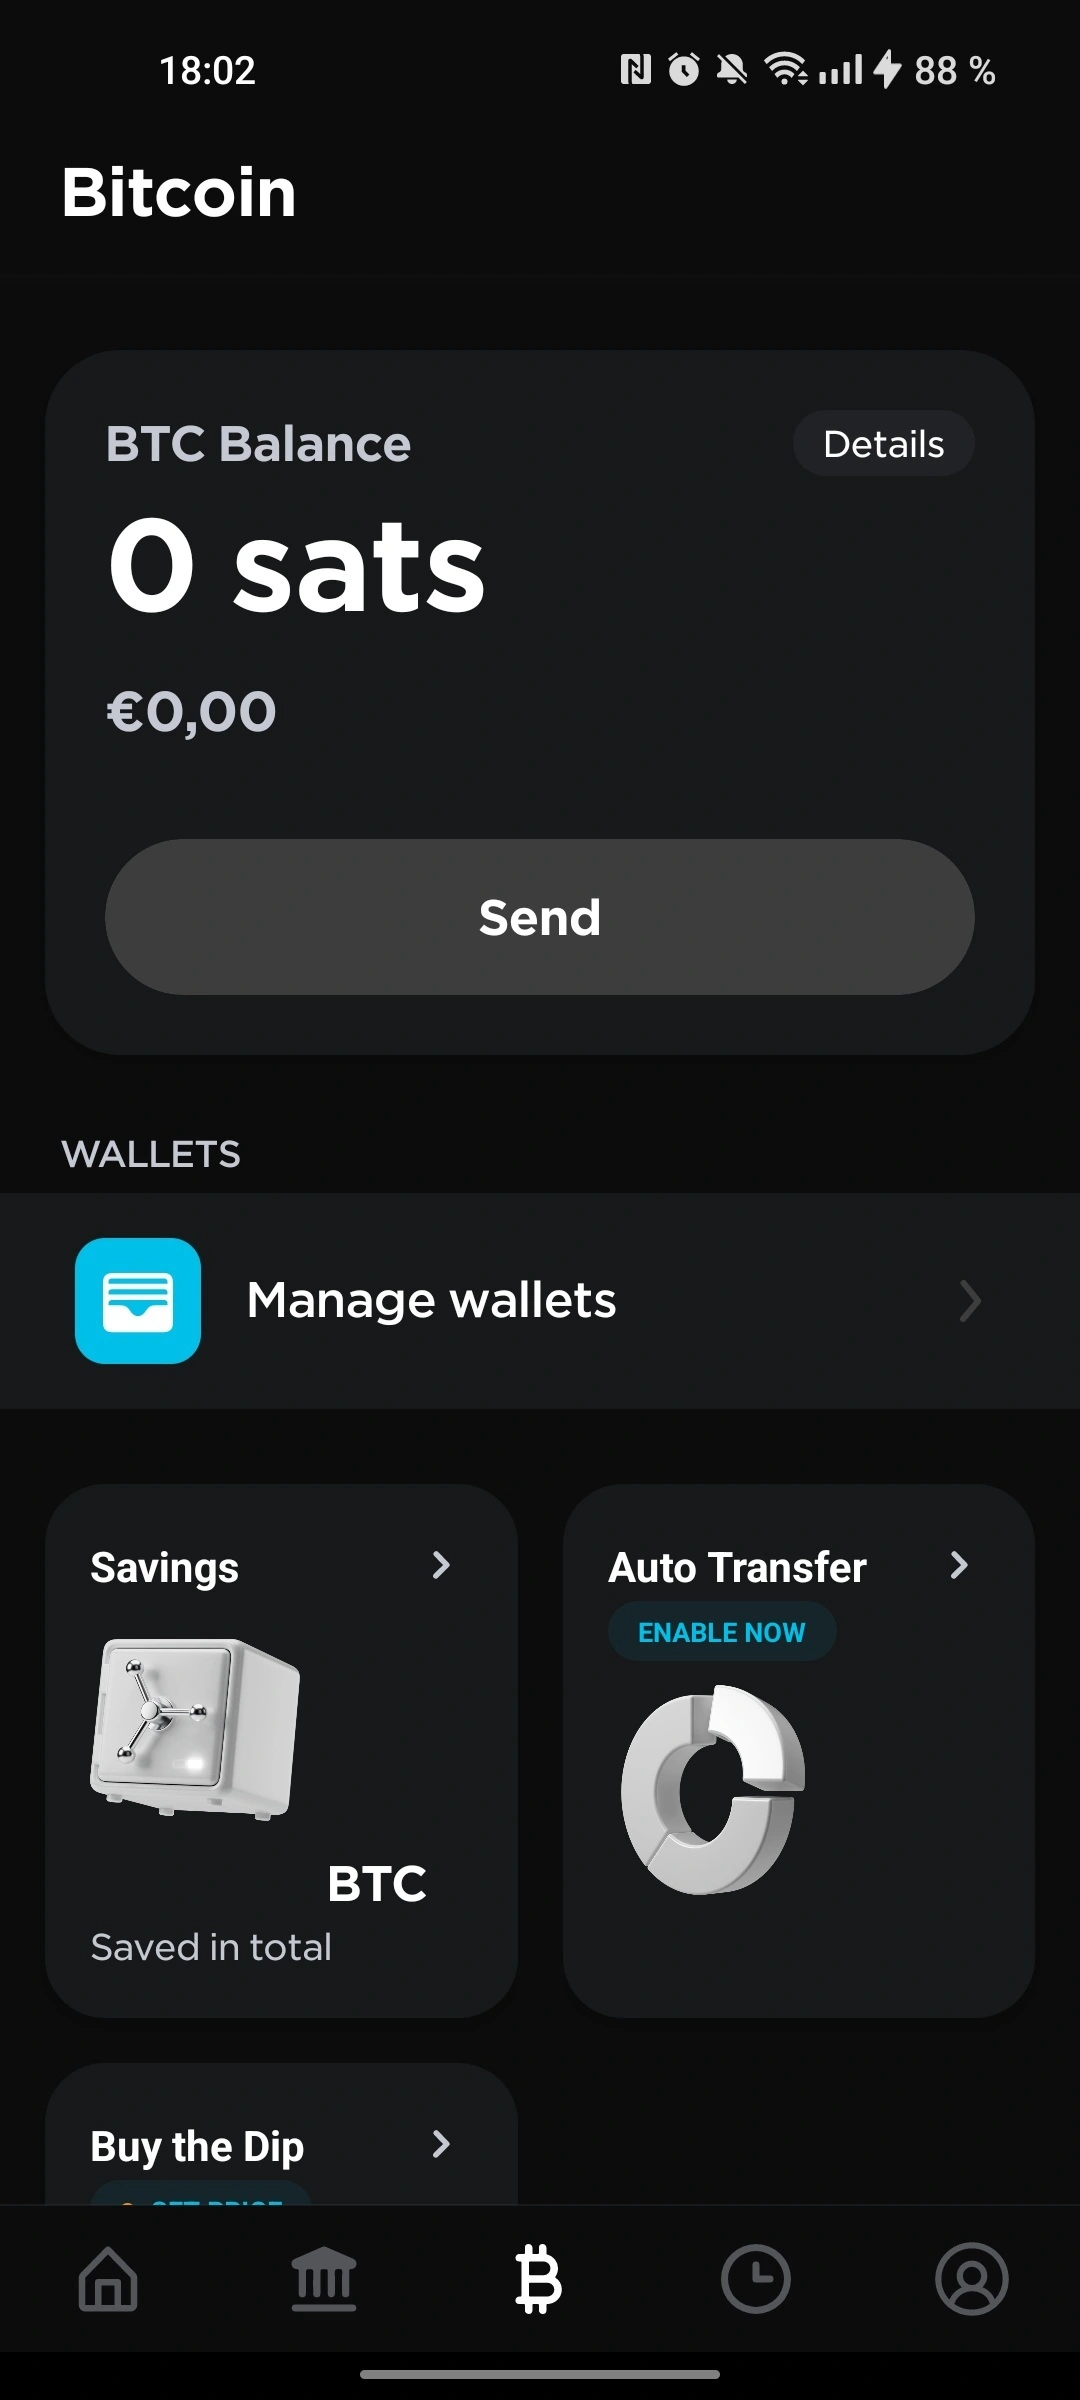
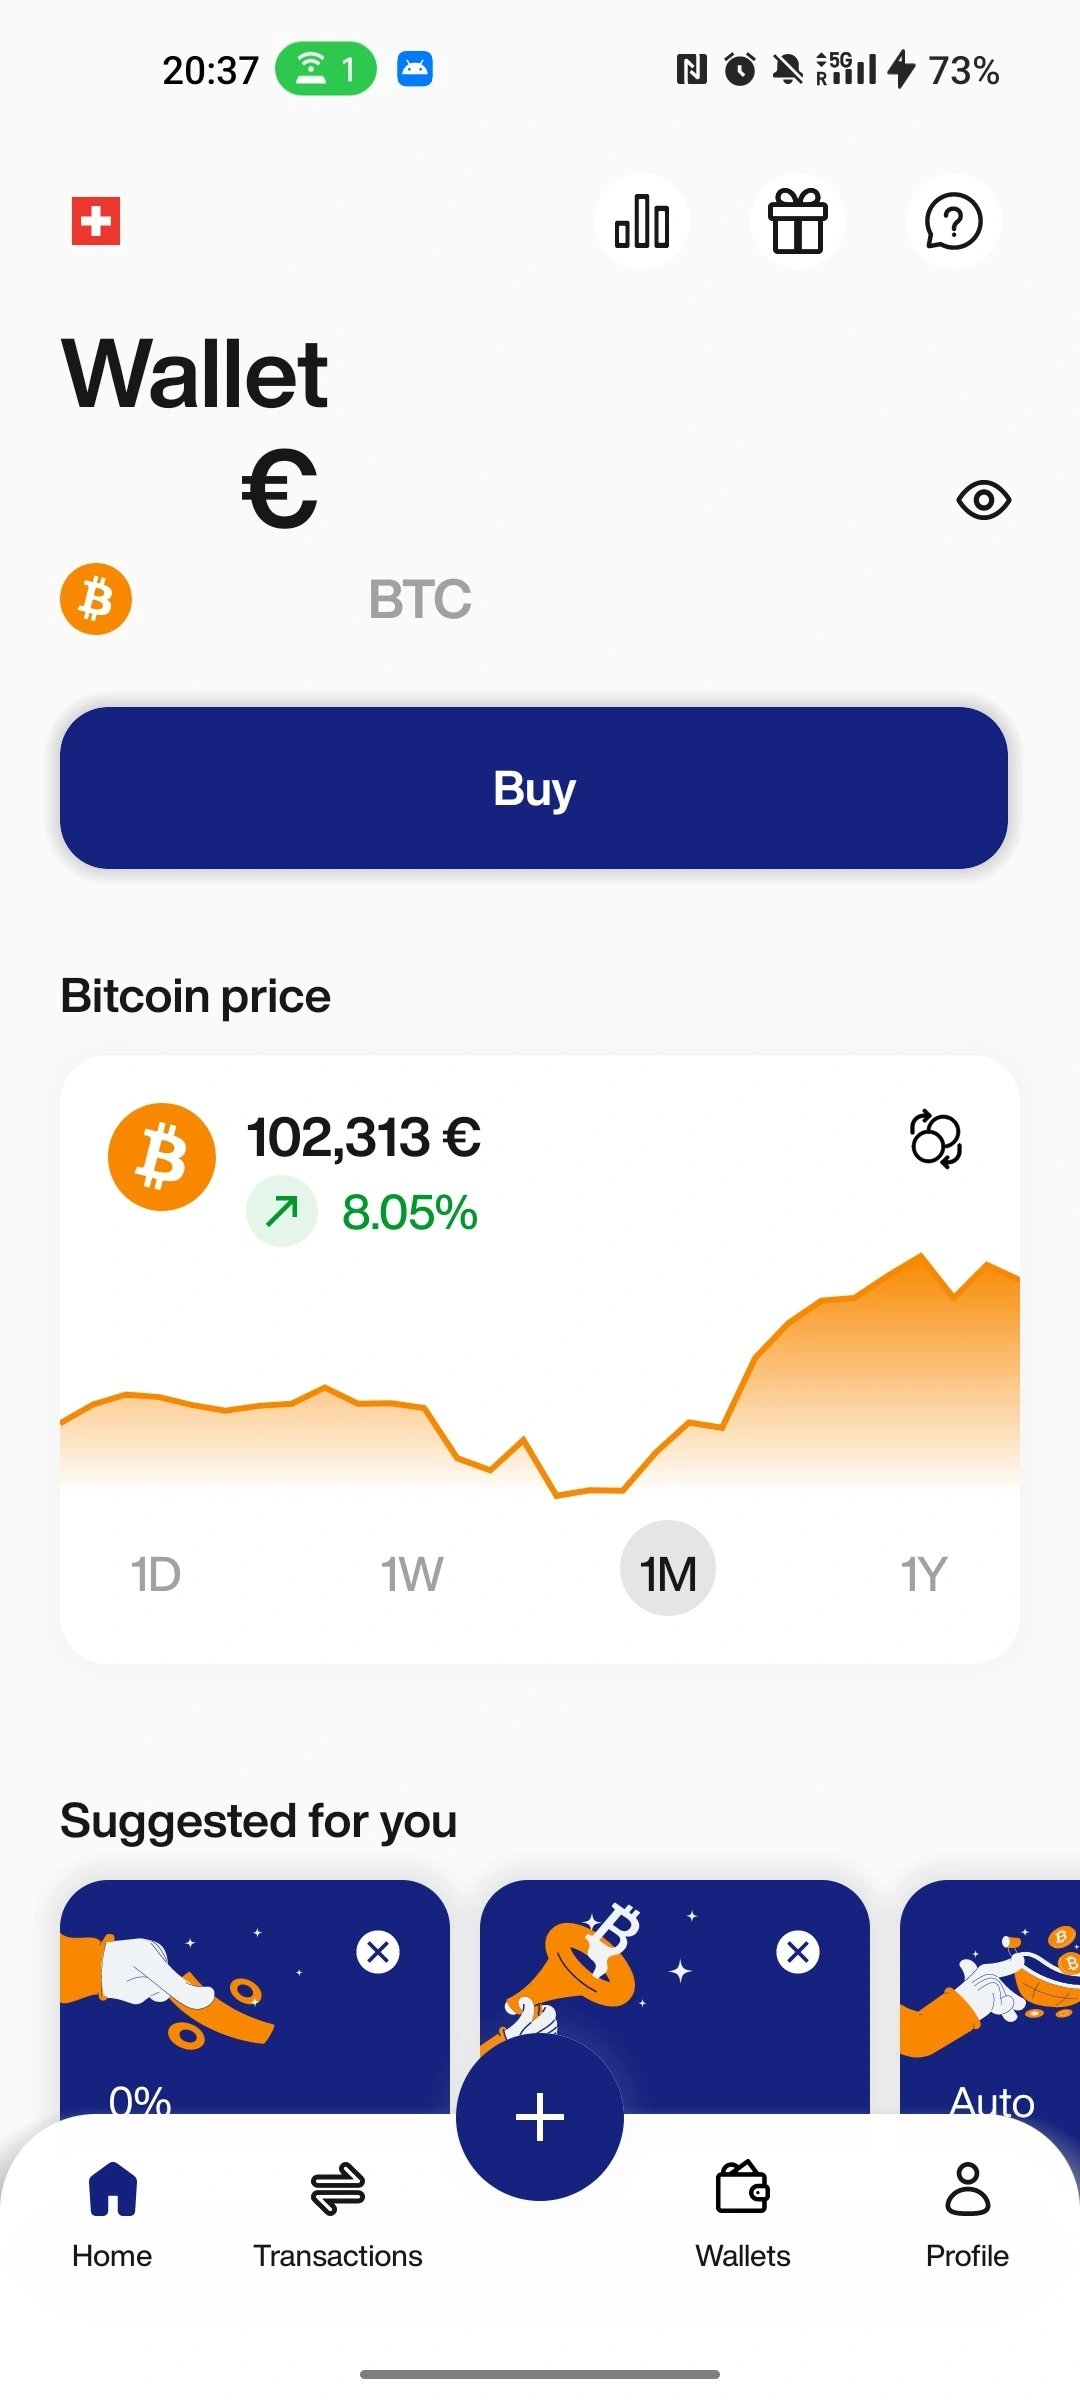
Once your account is verified and everything is set up, you can start buying sats! These sats will be held in the exchange's wallet, from which you can buy or sell whenever you want at the current market price.
To implement our DCA strategy effectively, we need to configure two key features:
- A savings plan for automated periodic purchases
- Automatic transfers to your own Bitcoin wallet for self-custody
The savings plan ensures we buy regularly without manual effort. The automatic transfers are important because, although exchanges like 21Bitcoin are generally trustworthy, Bitcoin's philosophy is about self-custody and having full control over our funds. Let's start with the periodic purchases, then move on to wallet setup and transfers.
Periodic Purchases
In 21Bitcoin go to: Bitcoin → Savings → Show Deposit Details.
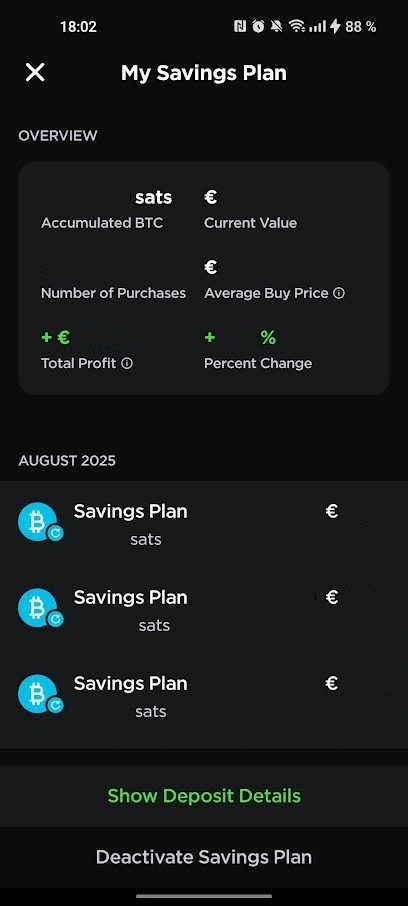
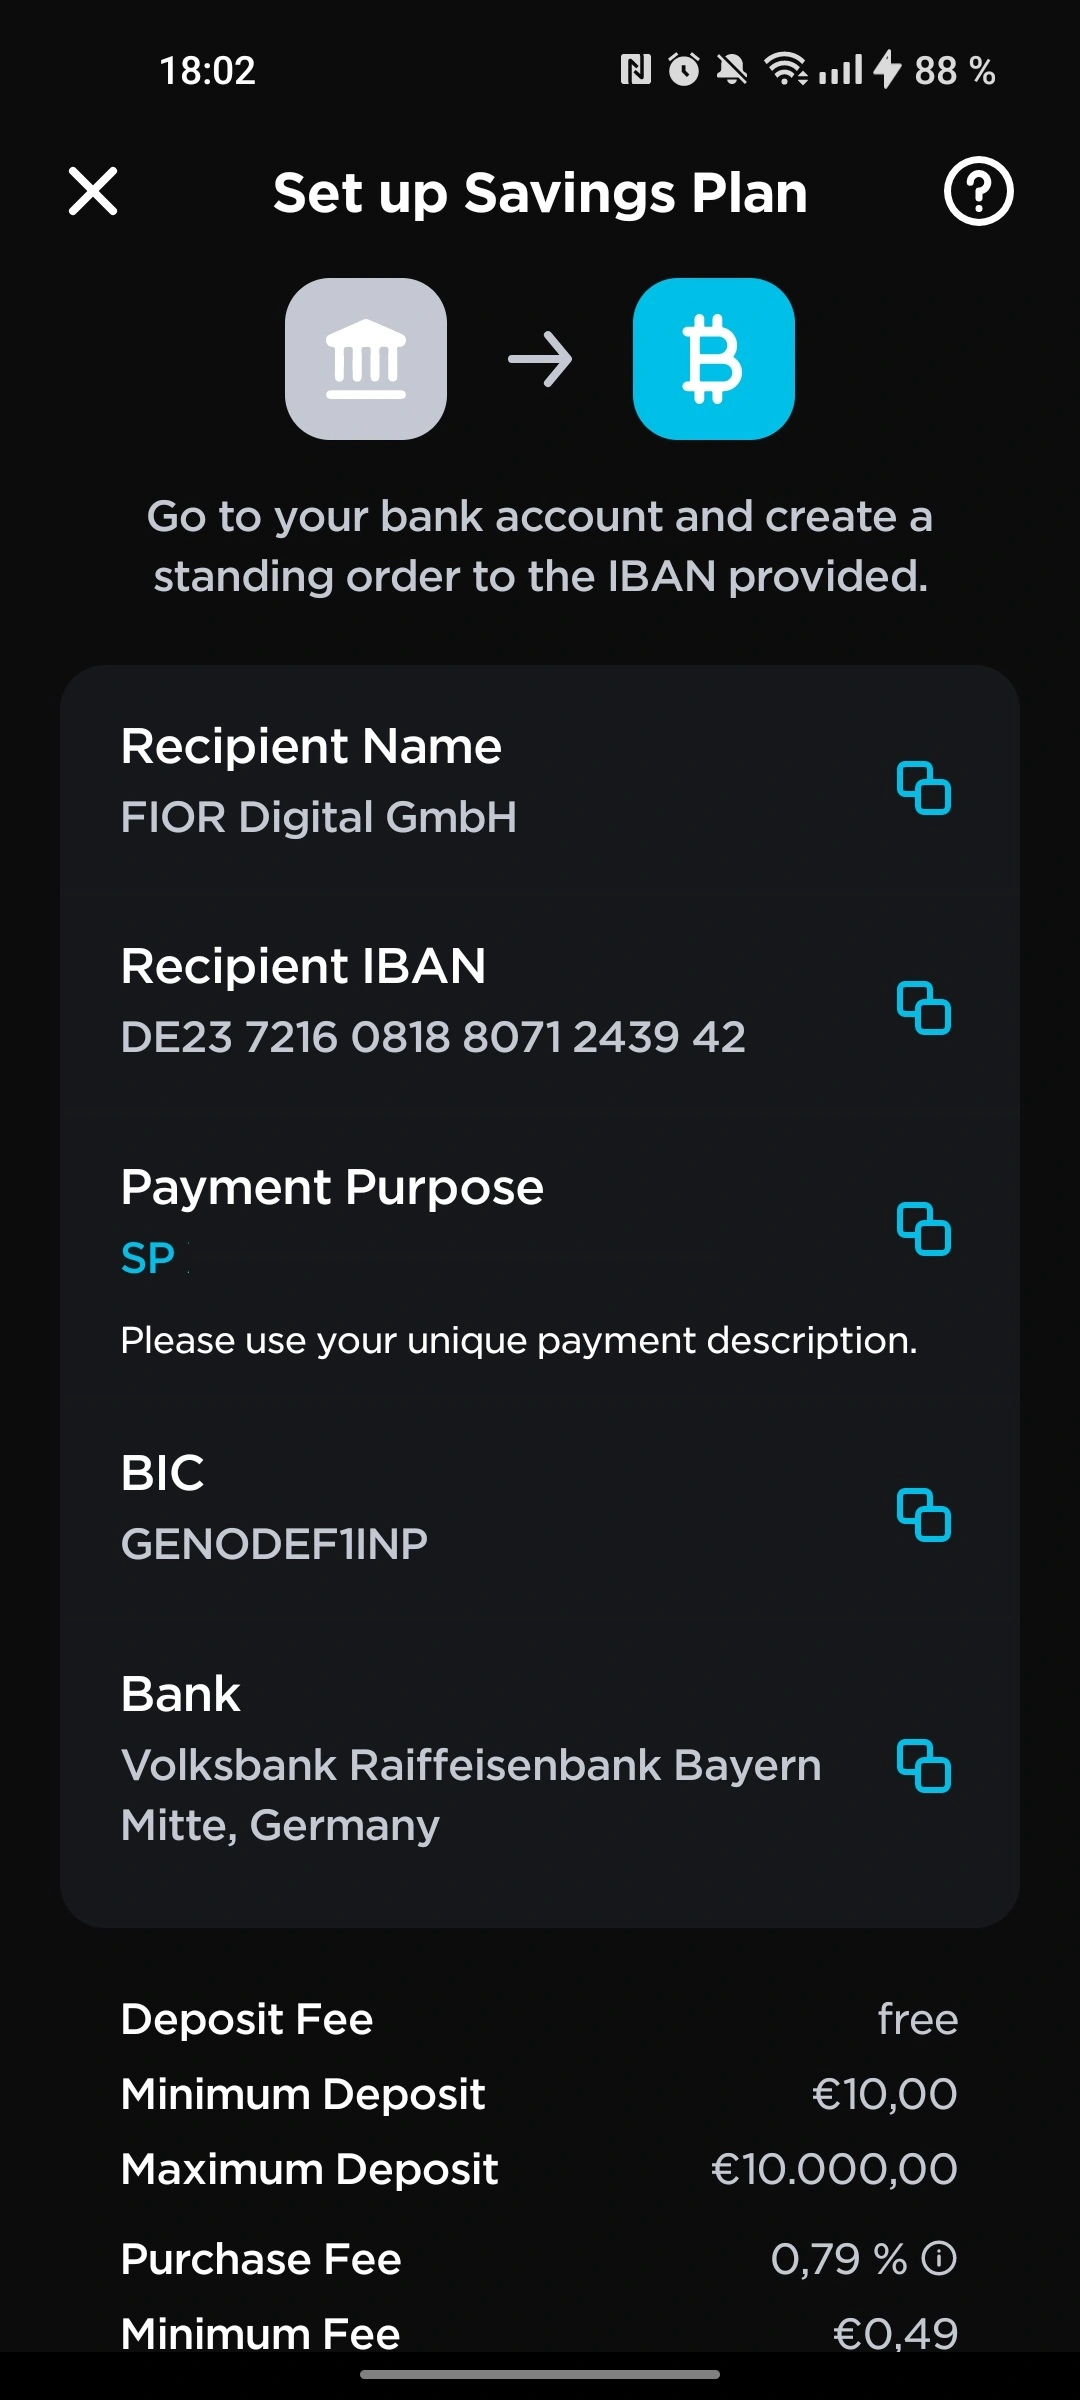
Use this information to set up automatic Bitcoin purchases from your bank account to 21Bitcoin. Start with an amount you're comfortable with, perhaps 100€ per month, and then adjust as you gain experience.
Key details to note:
- 0.79% purchase fee, quite reasonable for long-term investing
- 10€ minimum for savings plans (smaller amounts will be returned)
- Sats arrive in a few hours
Fee optimization tip: Consider the frequency of your purchases relative to fees. Four weekly 30€ purchases cost more in fees (1.96€ total) than one monthly 120€ purchase (0.95€). However, as your purchase amounts increase, this difference becomes negligible, and you can prioritize the DCA benefits of more frequent purchases.
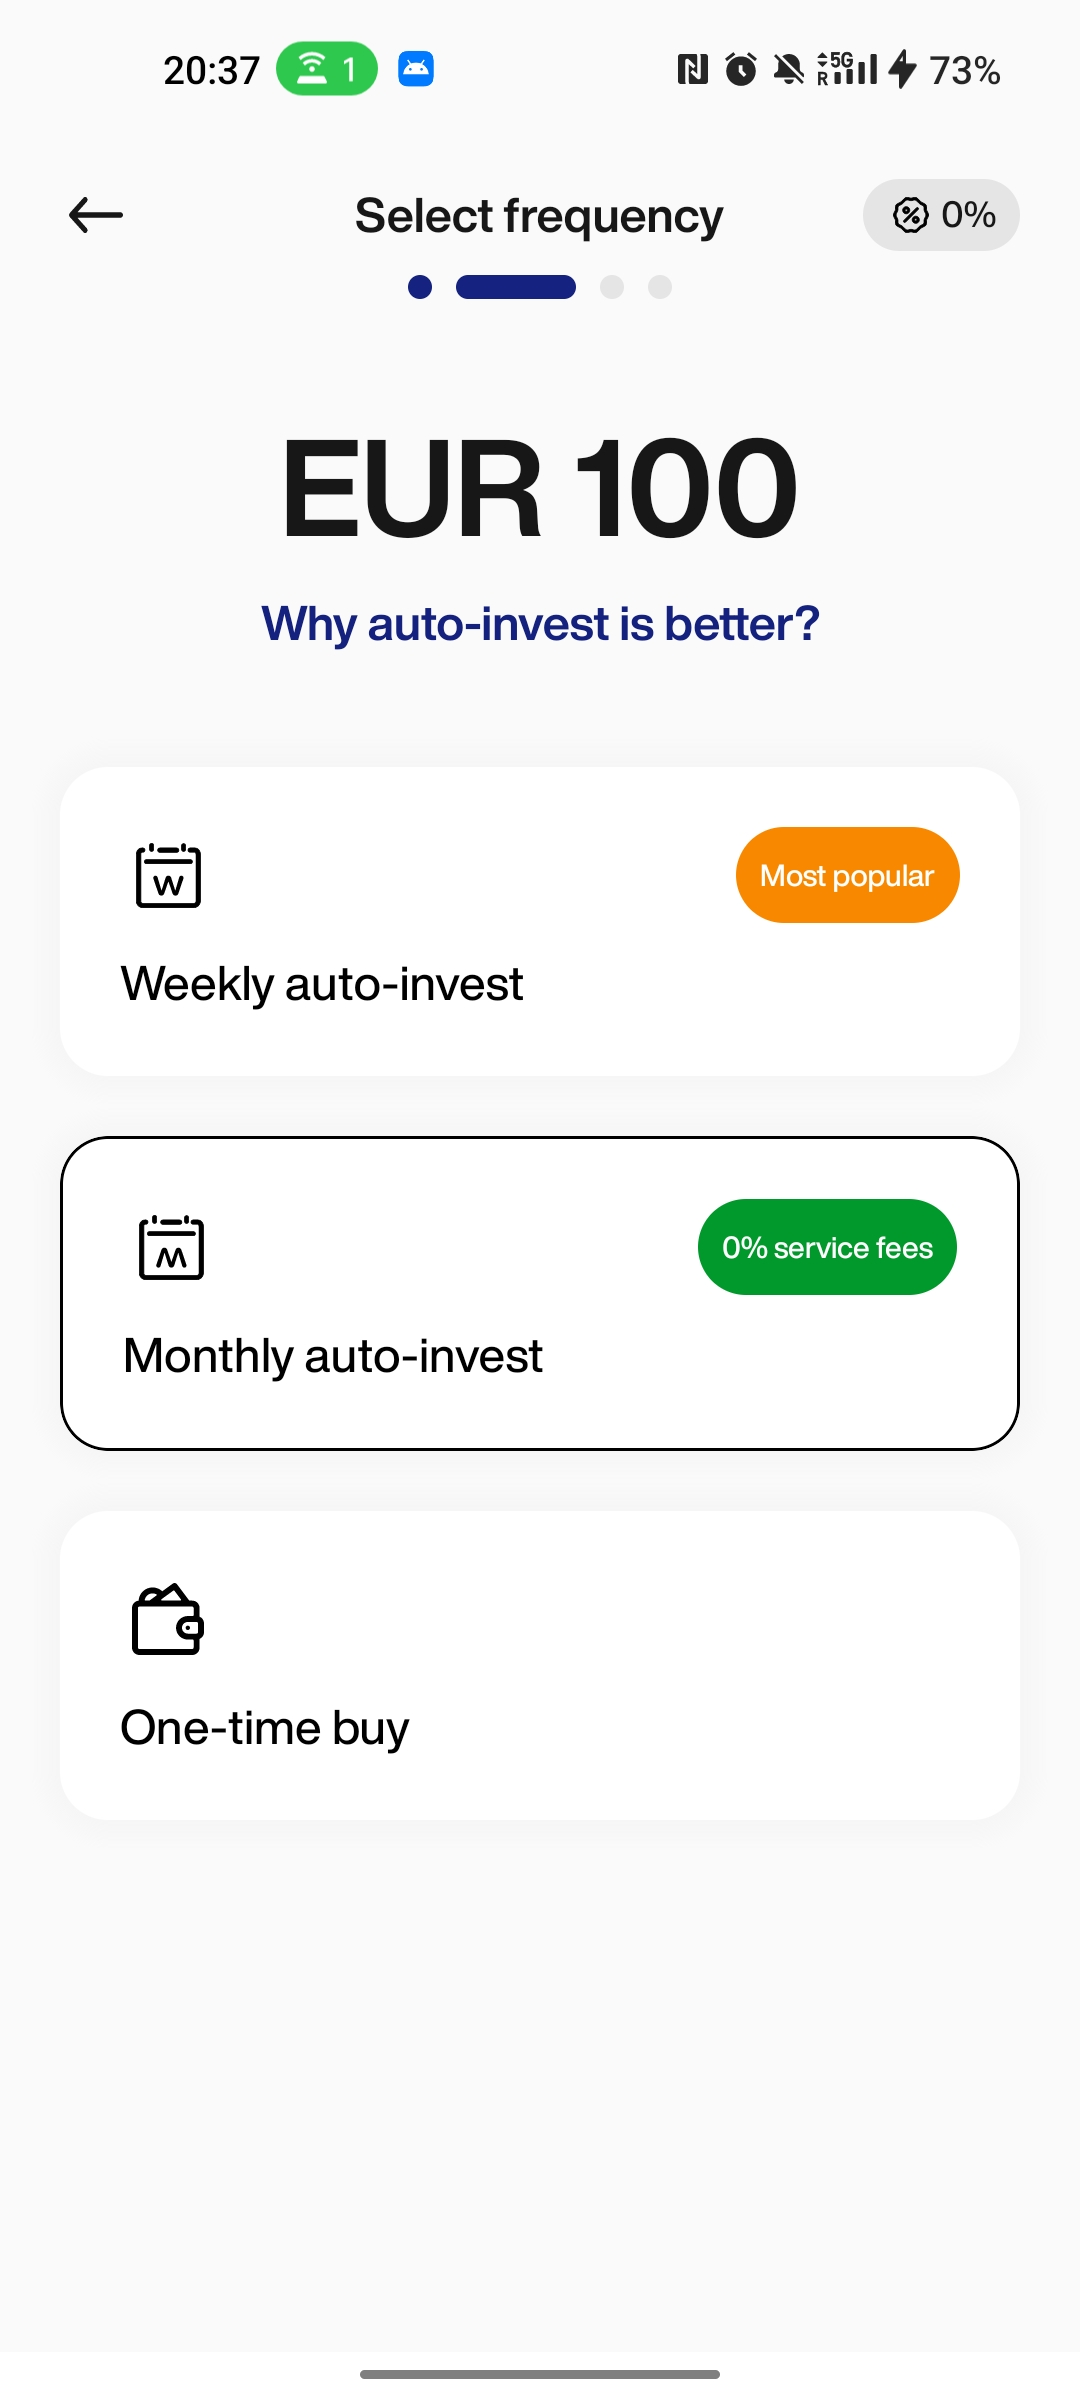
In Relai:
- Click Buy
- Select amount
- Select weekly auto-invest or Monthly auto-invest
- Select Payment Method
- Review the order summary and click Buy Now (ignore "Use external wallet" for now, we'll cover that later)
- Copy the Payment details into your bank account
- Click Done

Use the information in Payment details to set up automatic Bitcoin purchases from your bank account to Relai. Start with an amount you're comfortable with, perhaps 100€ per month, and then adjust as you gain experience.
Key details to note:
- Up to 100€ every month with 0% purchase fee!
- 1% purchase fee, quite reasonable for long-term investing
- 50€ minimum per purchase
- Sats arrive the next day
We've covered how to buy your first sats. Now let's see how you can set up your first BTC wallet.
Setting up your BTC Wallet
On your phone, install BlueWallet. This is a user-friendly and well-regarded open-source Bitcoin wallet that will allow you to store your sats securely instead of relying on the exchange. While BlueWallet is a hot wallet (which has its own risks), it's safer than leaving your Bitcoin on an exchange app where you depend on a third party.
Hot vs Cold Wallets: Both hot and cold wallets allow their owners to send or receive sats. The difference is that a hot wallet like BlueWallet generates your private seed using an internet-connected device, making it convenient but potentially vulnerable during seed creation. A cold wallet (like Coldcard or BitBox) generates your seed completely offline, providing maximum security. For beginners, a reputable hot wallet offers a good balance of security and usability.
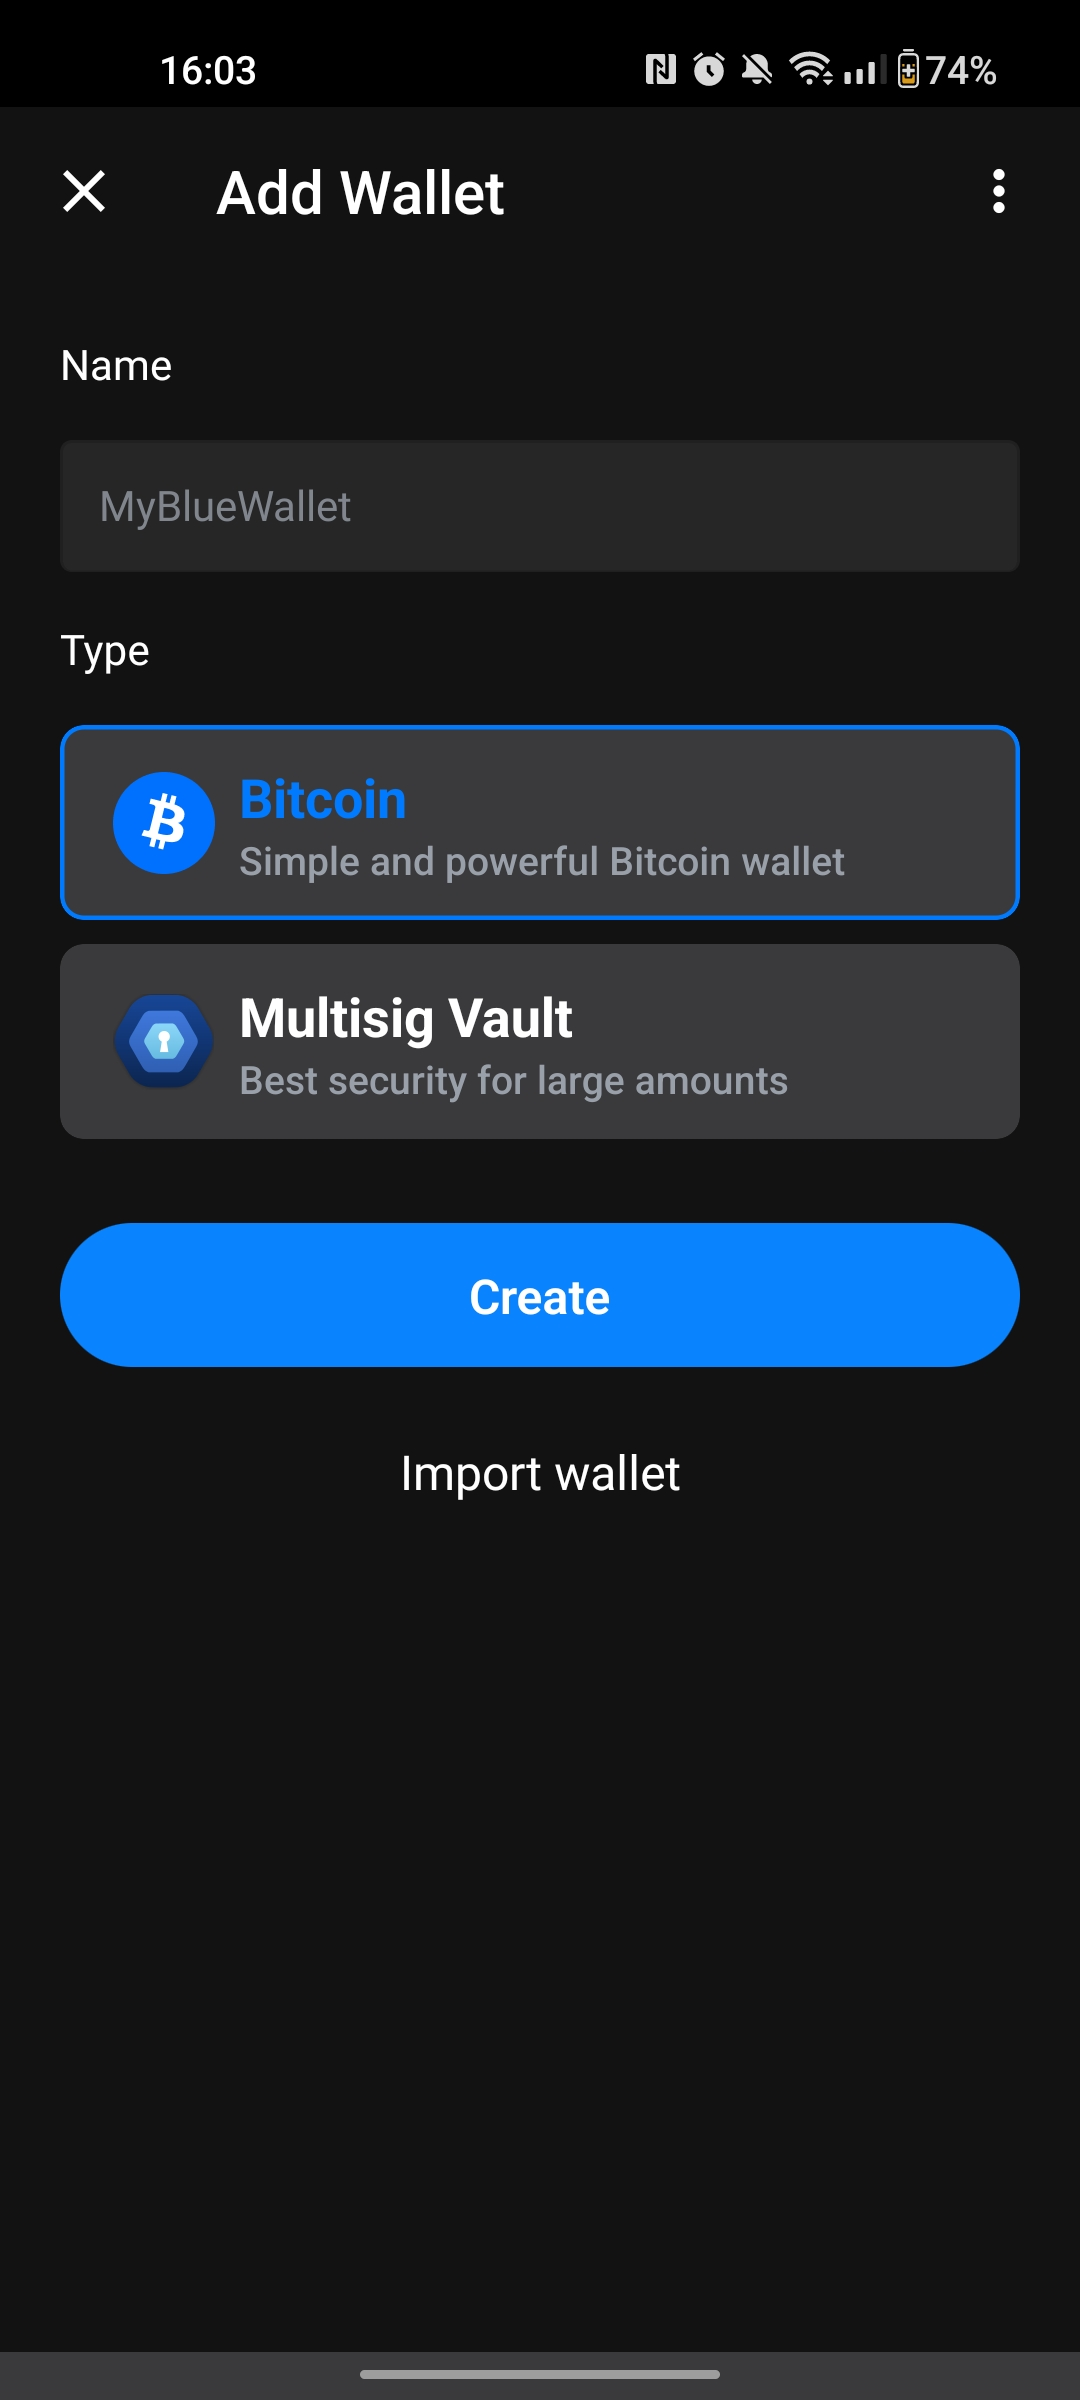
After installing BlueWallet, let's create our first wallet:
- Click Add now in the Add a wallet box
- Give it a name like MyBlueWallet, select type Bitcoin, click Create
- The app will generate a seed phrase (12 words) that serves as the master key to your bitcoins

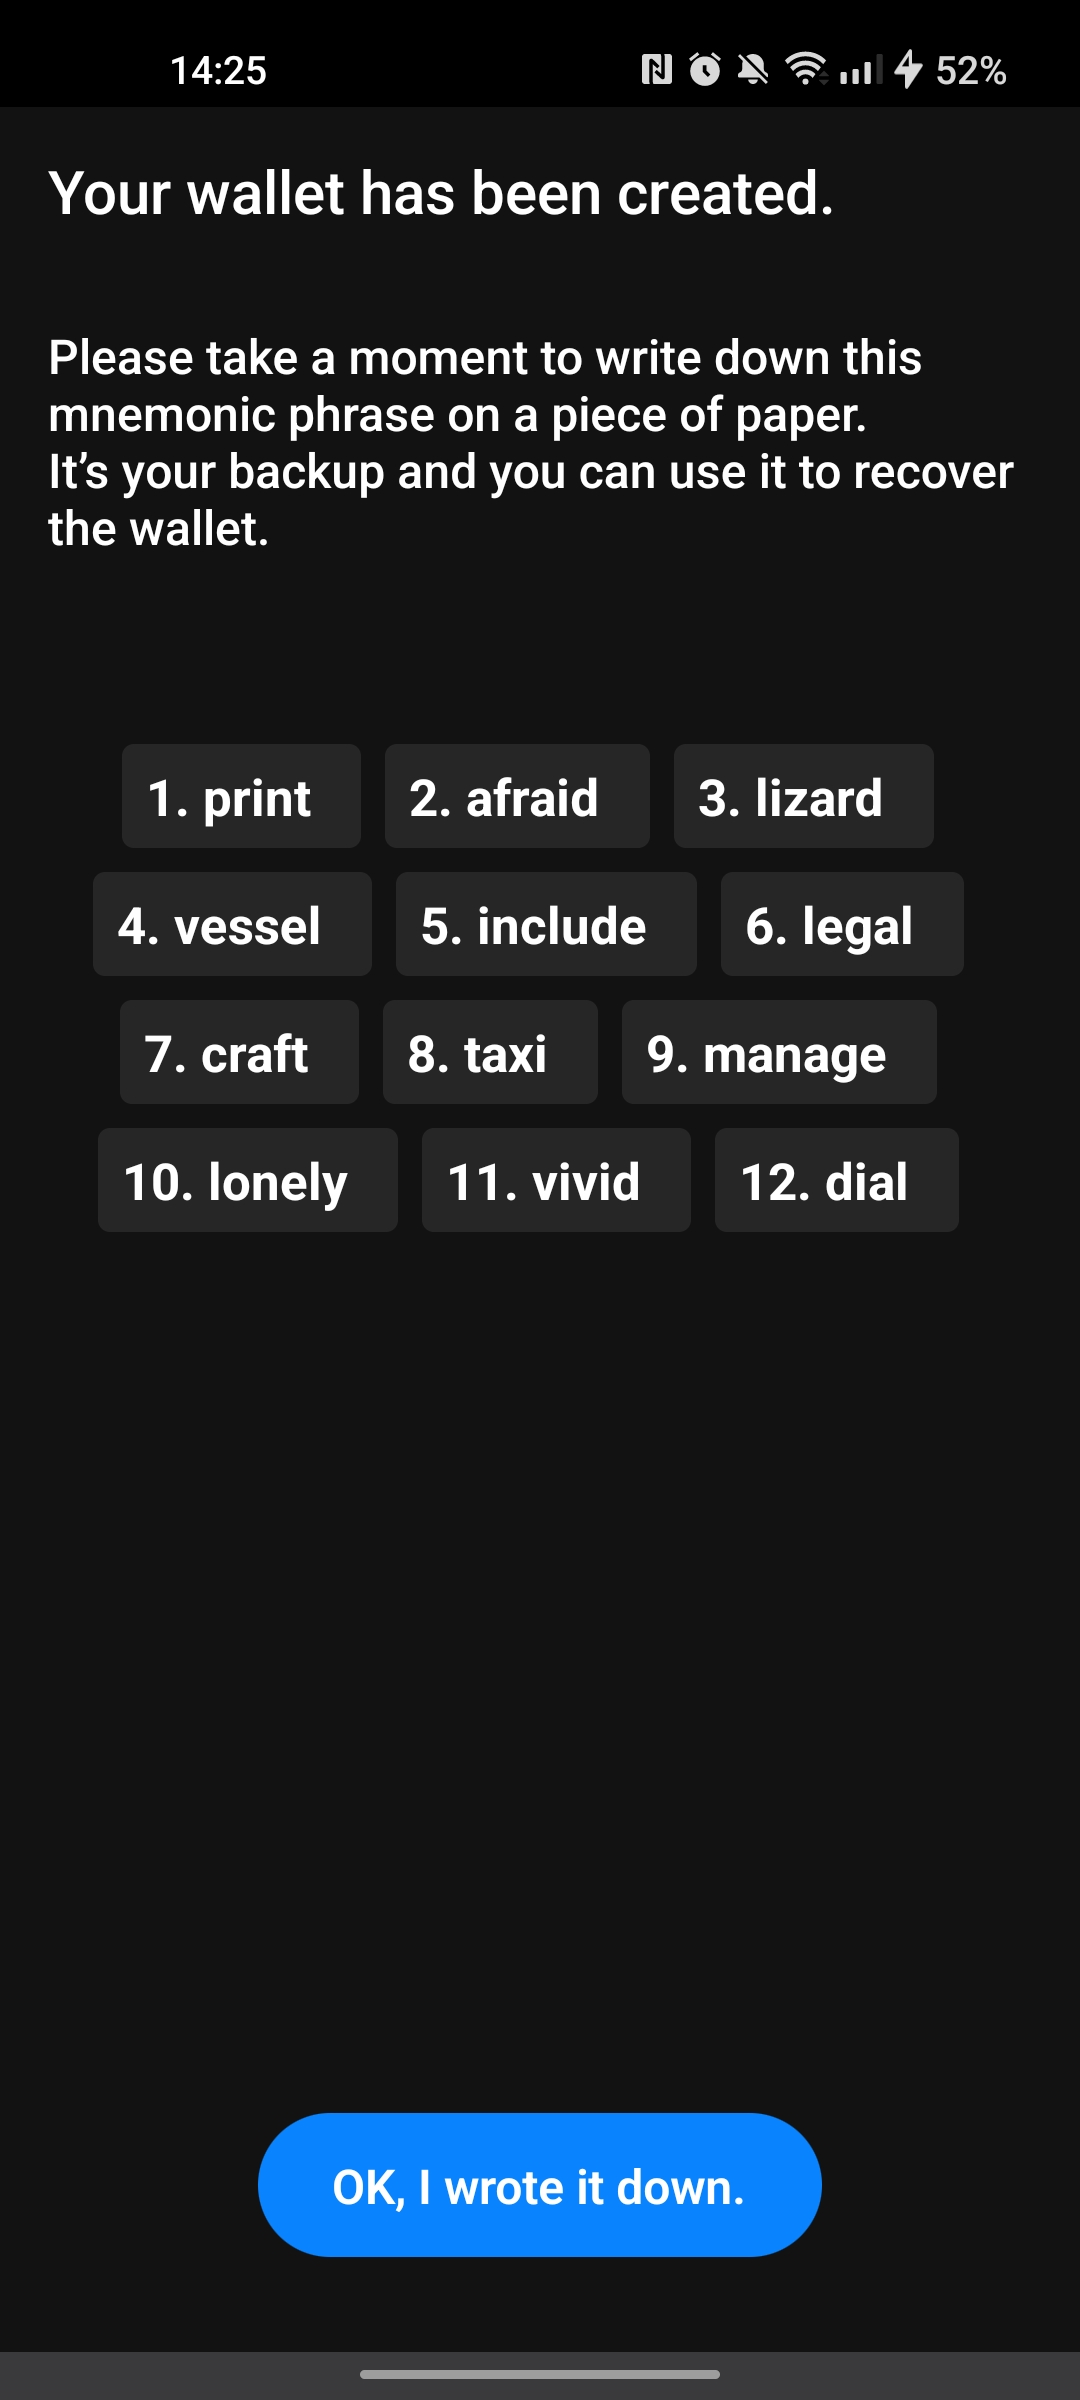
⚠️ Critical Security Warning: Your seed phrase is like your bank account password, it gives complete control over your sats. Anyone who has access to it can steal all your funds. Never share it with anyone and never store it digitally (notes apps, screenshots, emails) since malware could access these files. You can write it down on paper, but using a password manager is a better option for the long-term (paper can be lost, damaged, or destroyed).
In regards to the third screentshot, that's your seed phrase, it's your master key and only backup for recovering your wallet if you lose access to your phone. In the next section, we'll see how to store it safely using Bitwarden. Later we will see how to set up automatic transfers and how to make transactions with BlueWallet.
Setting up a Password Manager
If you already have a password manager, you are free to use it. Otherwise, I'll show you how to use Bitwarden to store your seed phrase.
On your phone, install Bitwarden and create an account. Choose a strong master password that you can remember, as this will be the key to accessing all your stored information.
⚠️ Critical Security Warning: Bitwarden is end-to-end encrypted, so they can't access your data or reset your master password. If you forget your master password, you'll lose access to everything permanently. Set a password hint and write the master password on a piece of paper if need be.
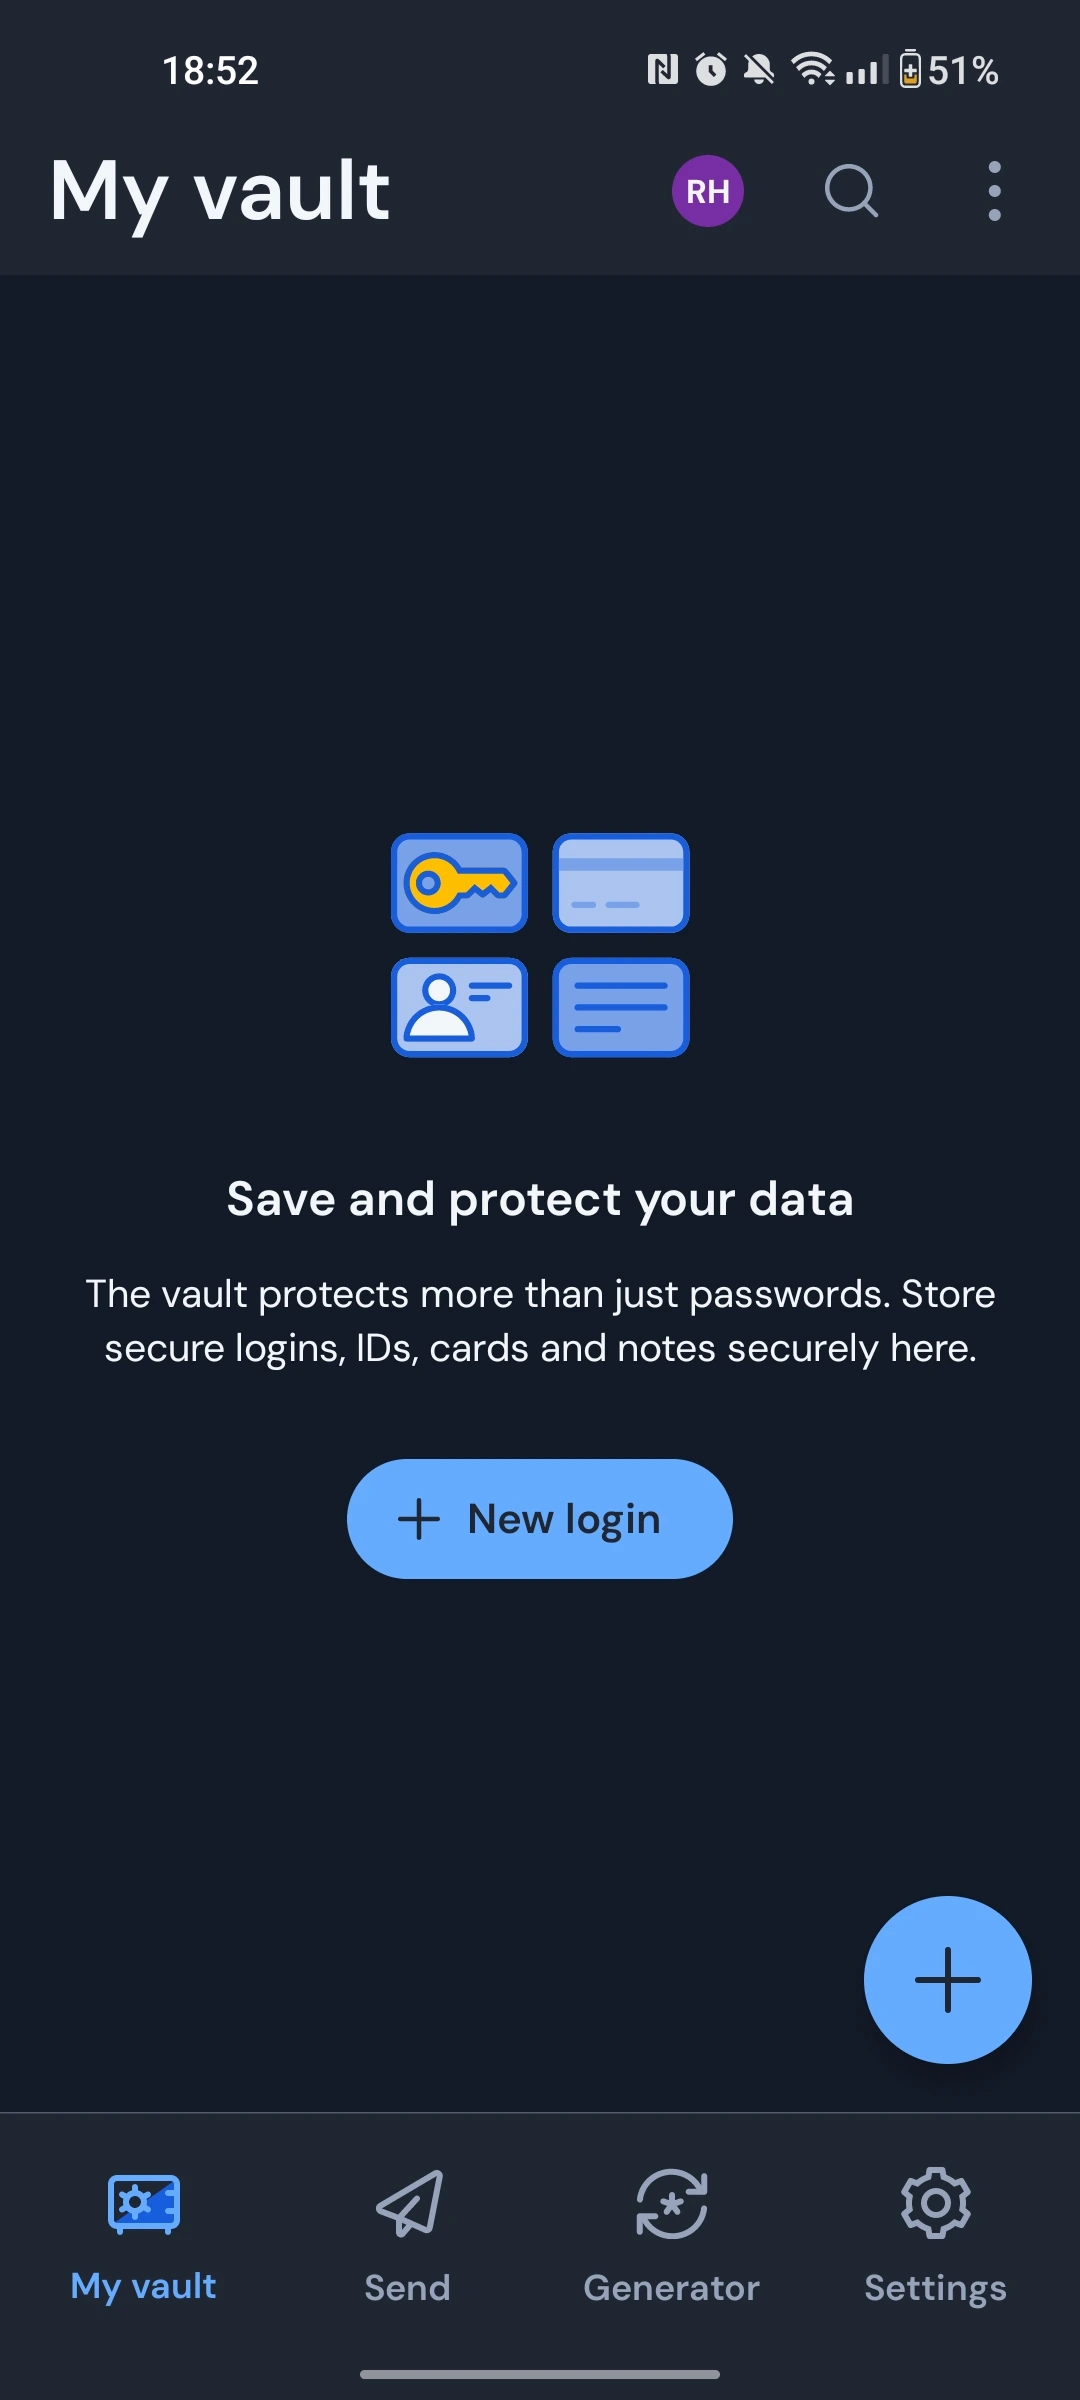
Once we have an account in Bitwarden, let's save the private seed:
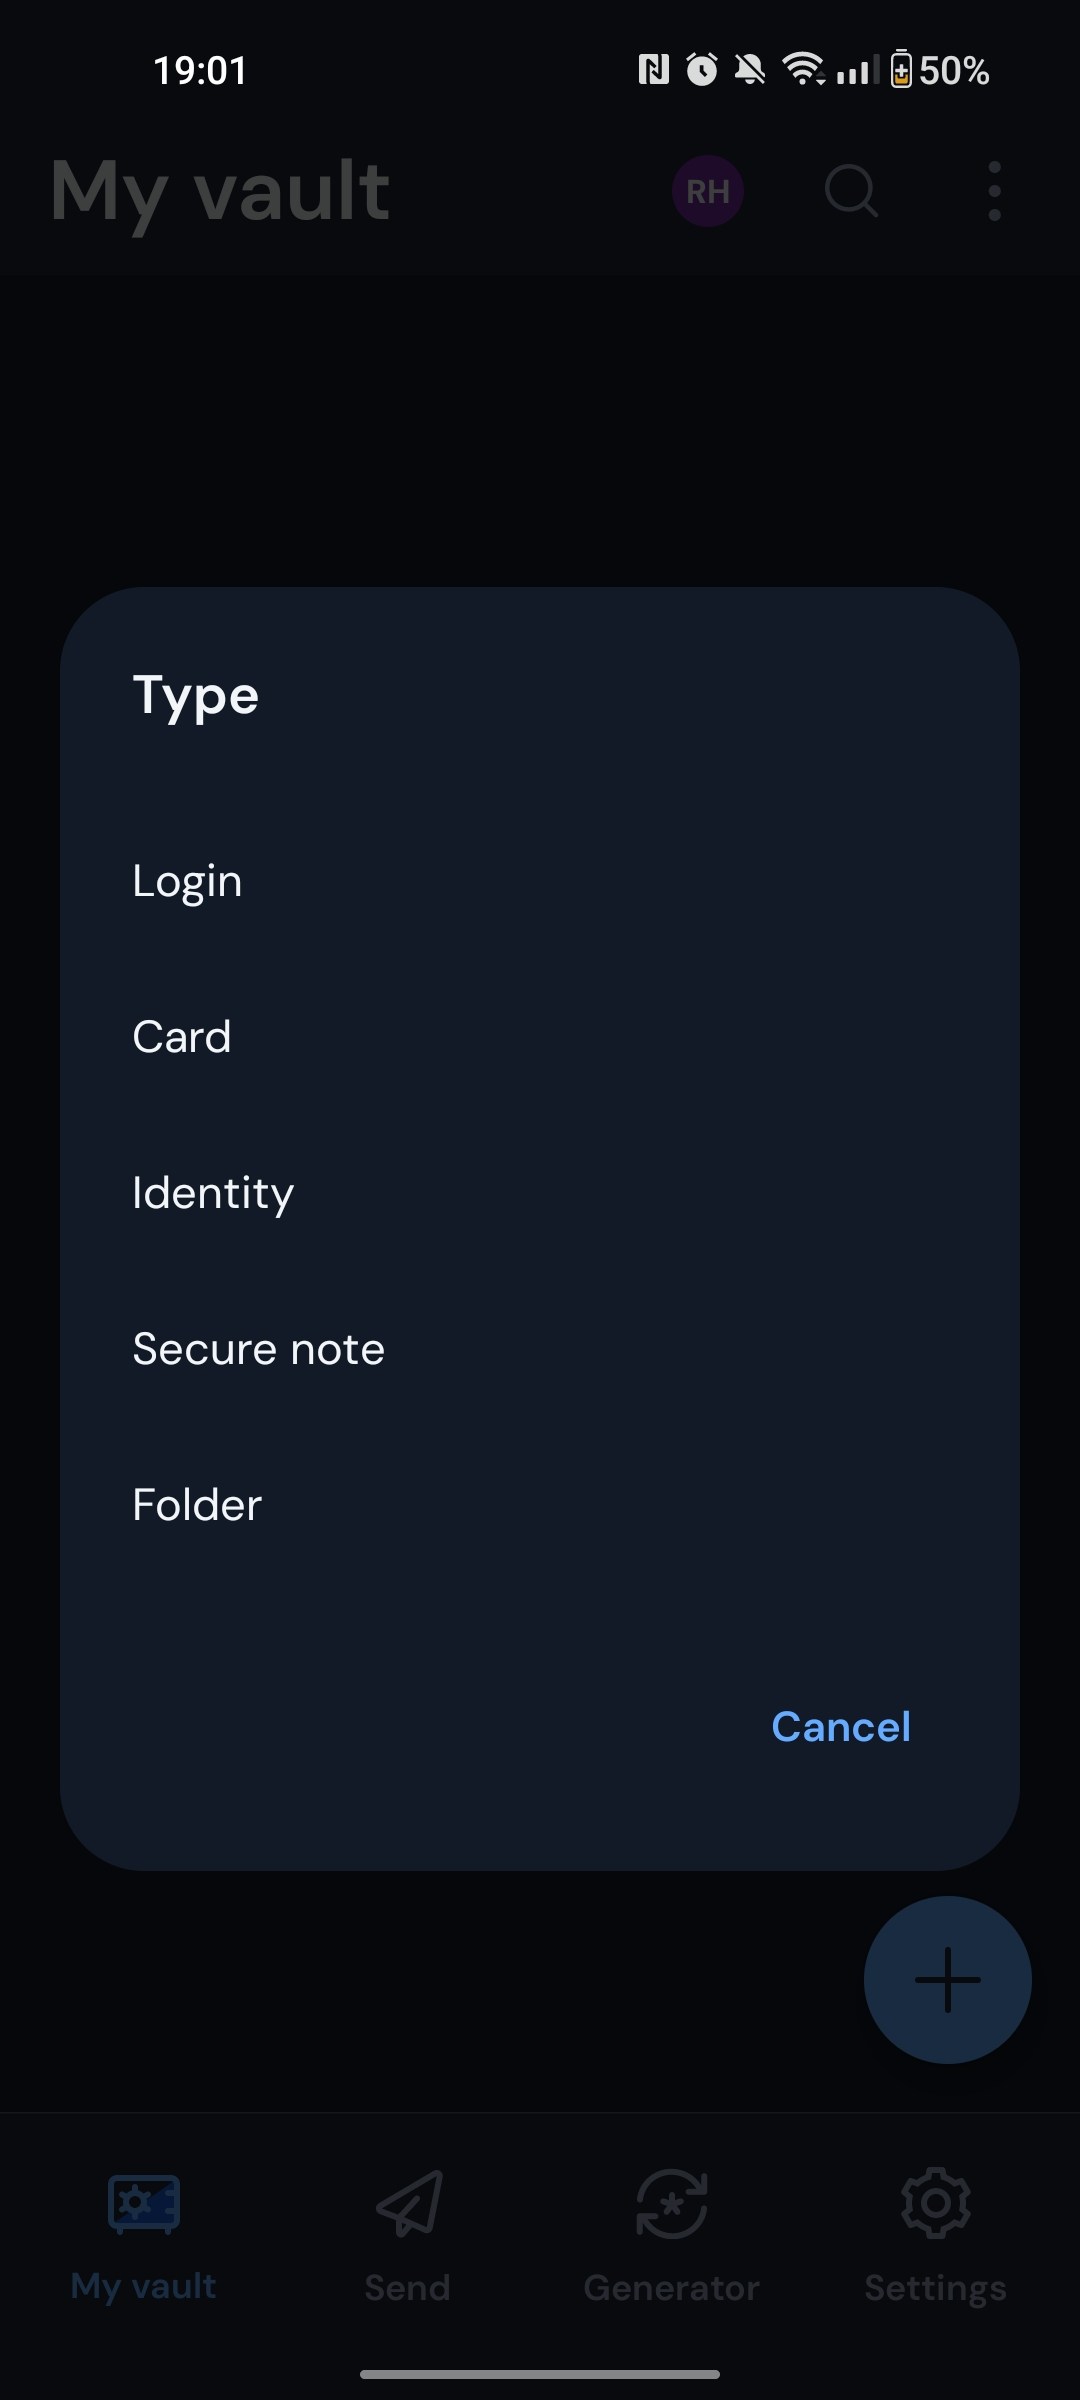
- Click the plus icon (+) at the bottom right
- Select Secure Note
- Give it a name like Blue Wallet, click on Additional options
- Click on Add field, select Hidden, name Seed Phrase
- Fill the Seed Phrase field with the 12 words in BlueWallet
- Click Save at the top right
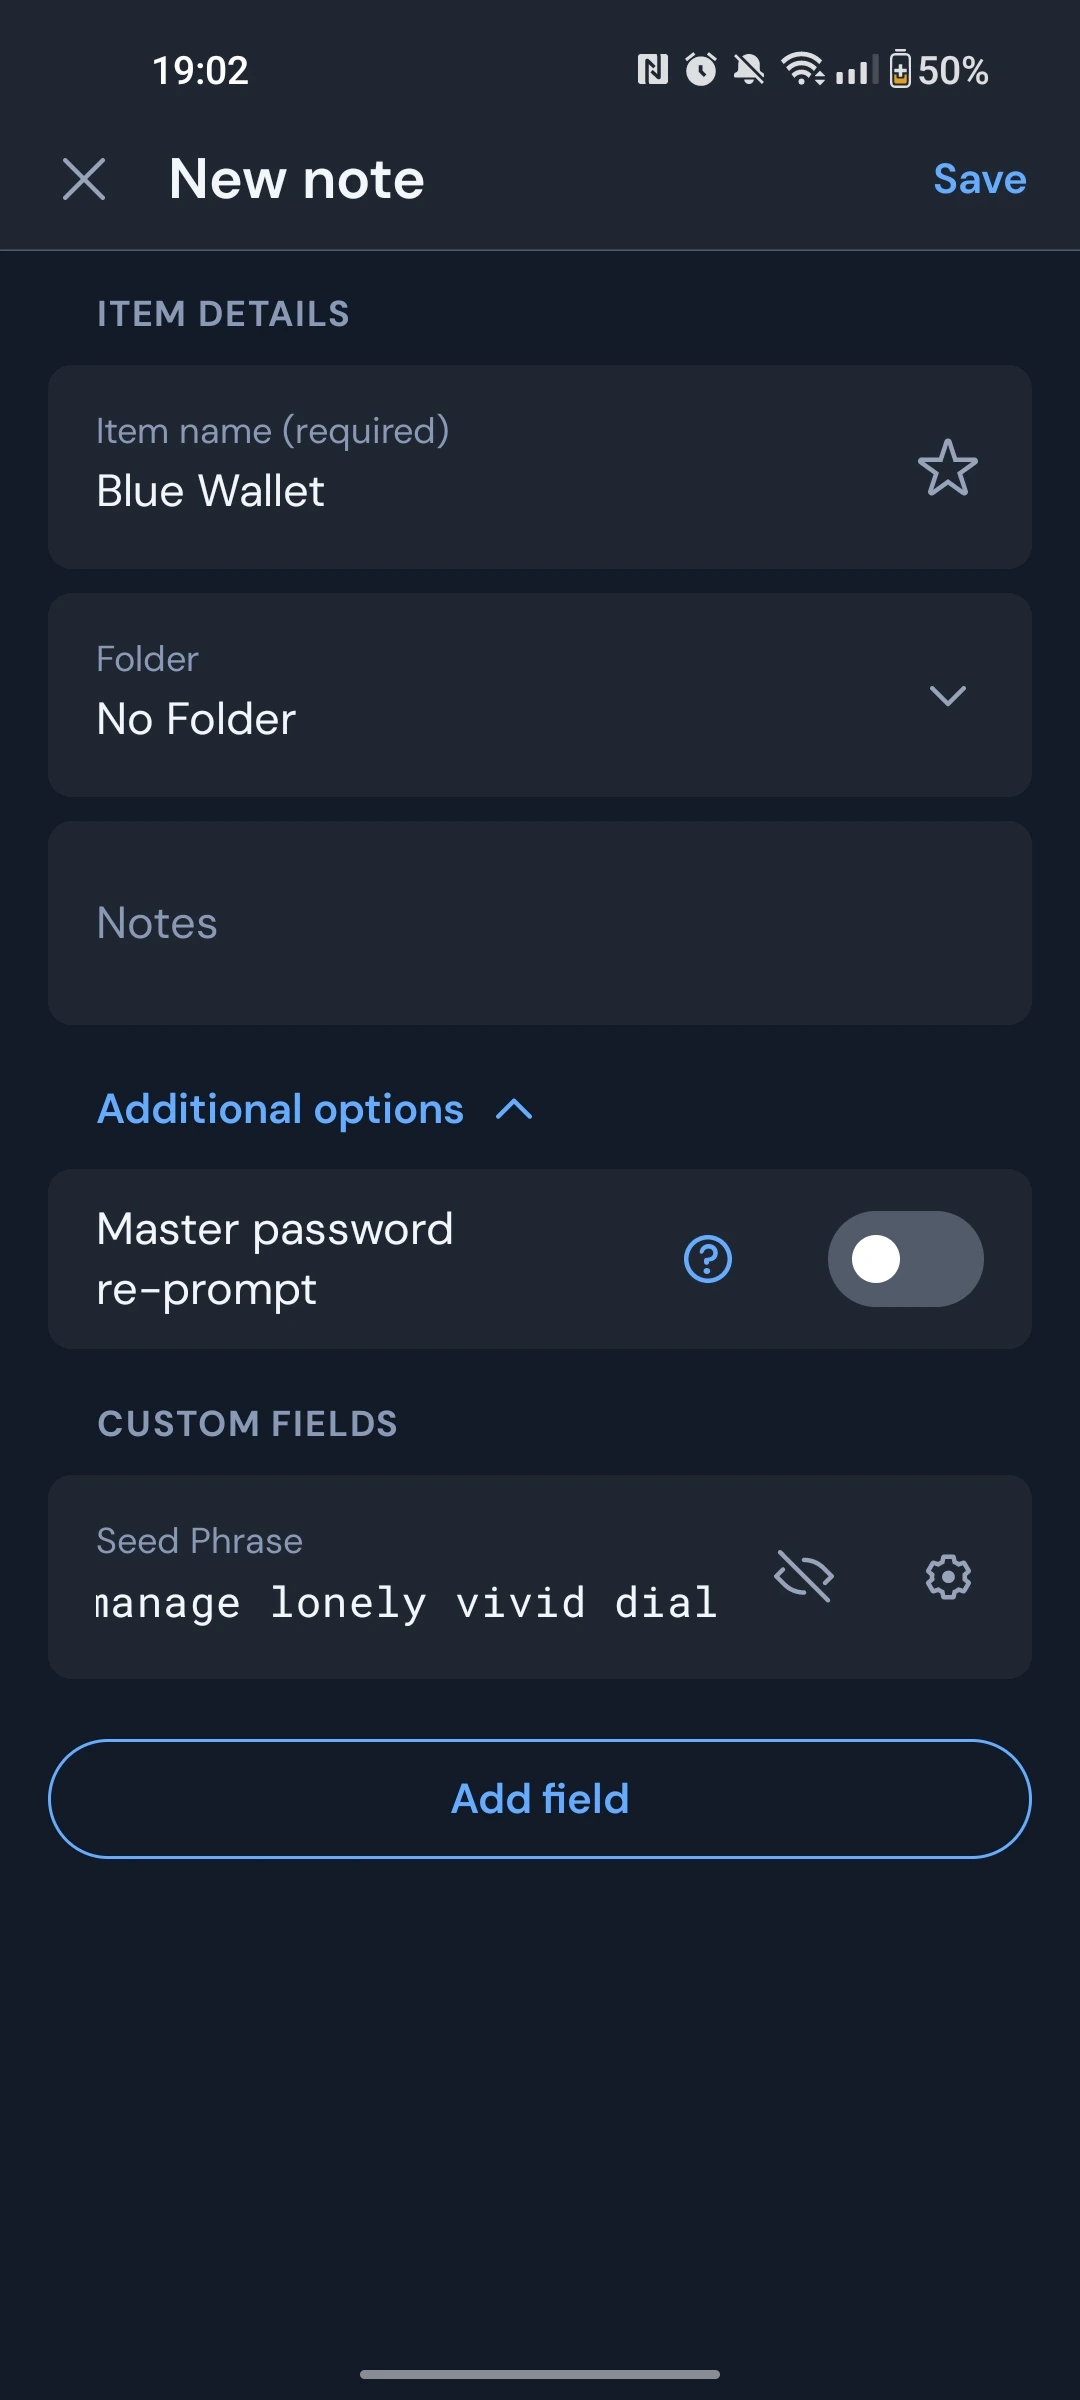
Now you should be able to access your note called Blue Wallet in Bitwarden, and see your seed phrase inside of it.
💡 Tip: If you can't find your 12 words in BlueWallet or made a mistake saving them in Bitwarden, just create a new wallet. It's free and takes seconds.
⚠️ Important: Double-check your seed phrase in Bitwarden for typos. Even one wrong letter means you won't be able to recover your funds if you lose your phone.
Let's see now how to configure automatic transfers from your chosen exchange to our BlueWallet.
Configuring Automatic Transfers
1. Obtain your Bitcoin address
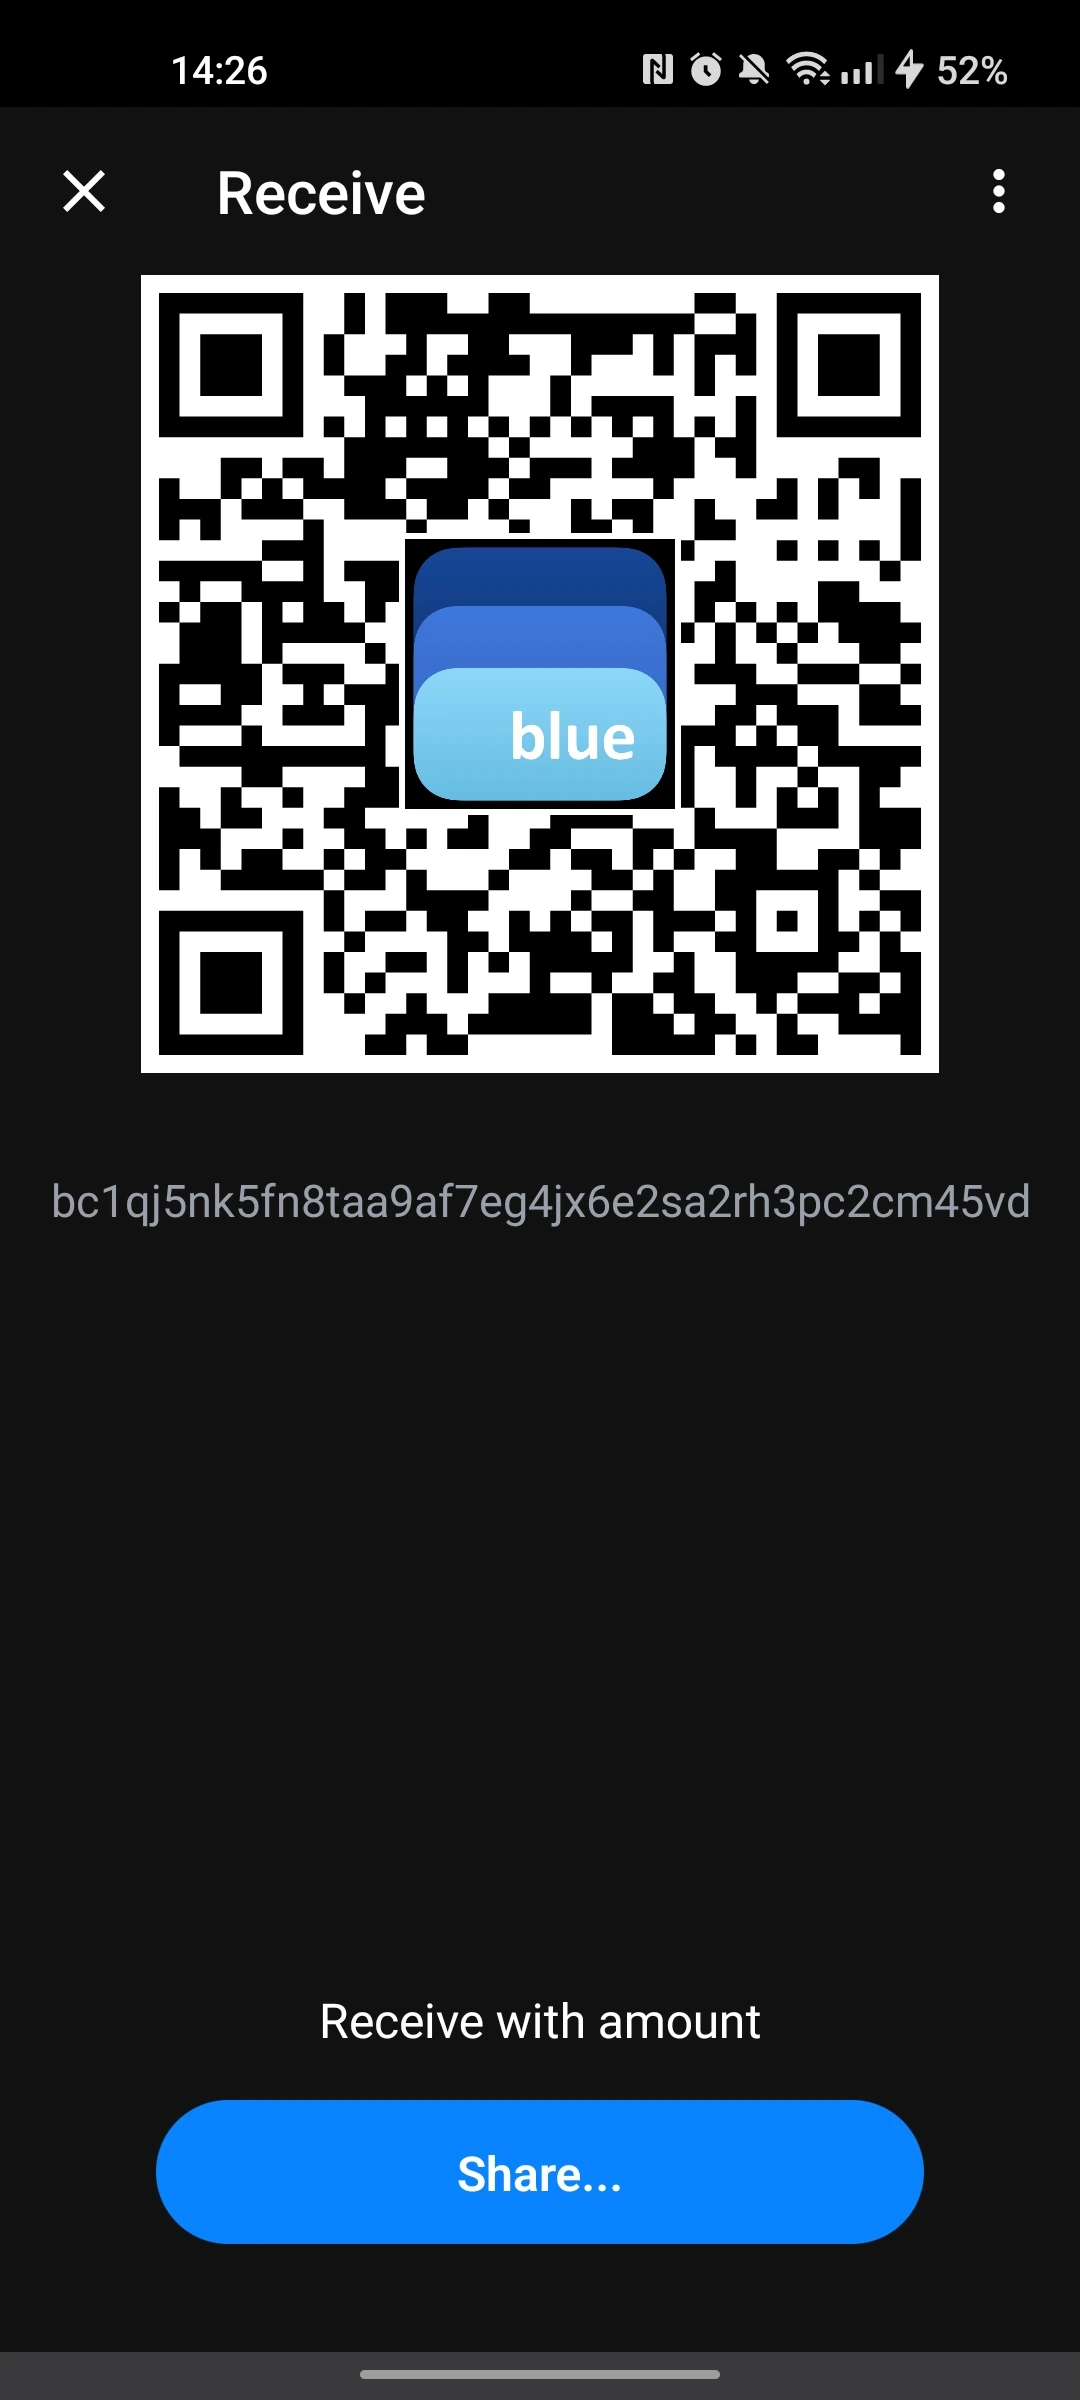
Let's obtain a Bitcoin address so you can receive sats in your Bitcoin wallet. A Bitcoin wallet can have multiple addresses. Think of your wallet as a mailbox and addresses as different slots where you can receive mail. In general, using different addresses helps keep your activity private.
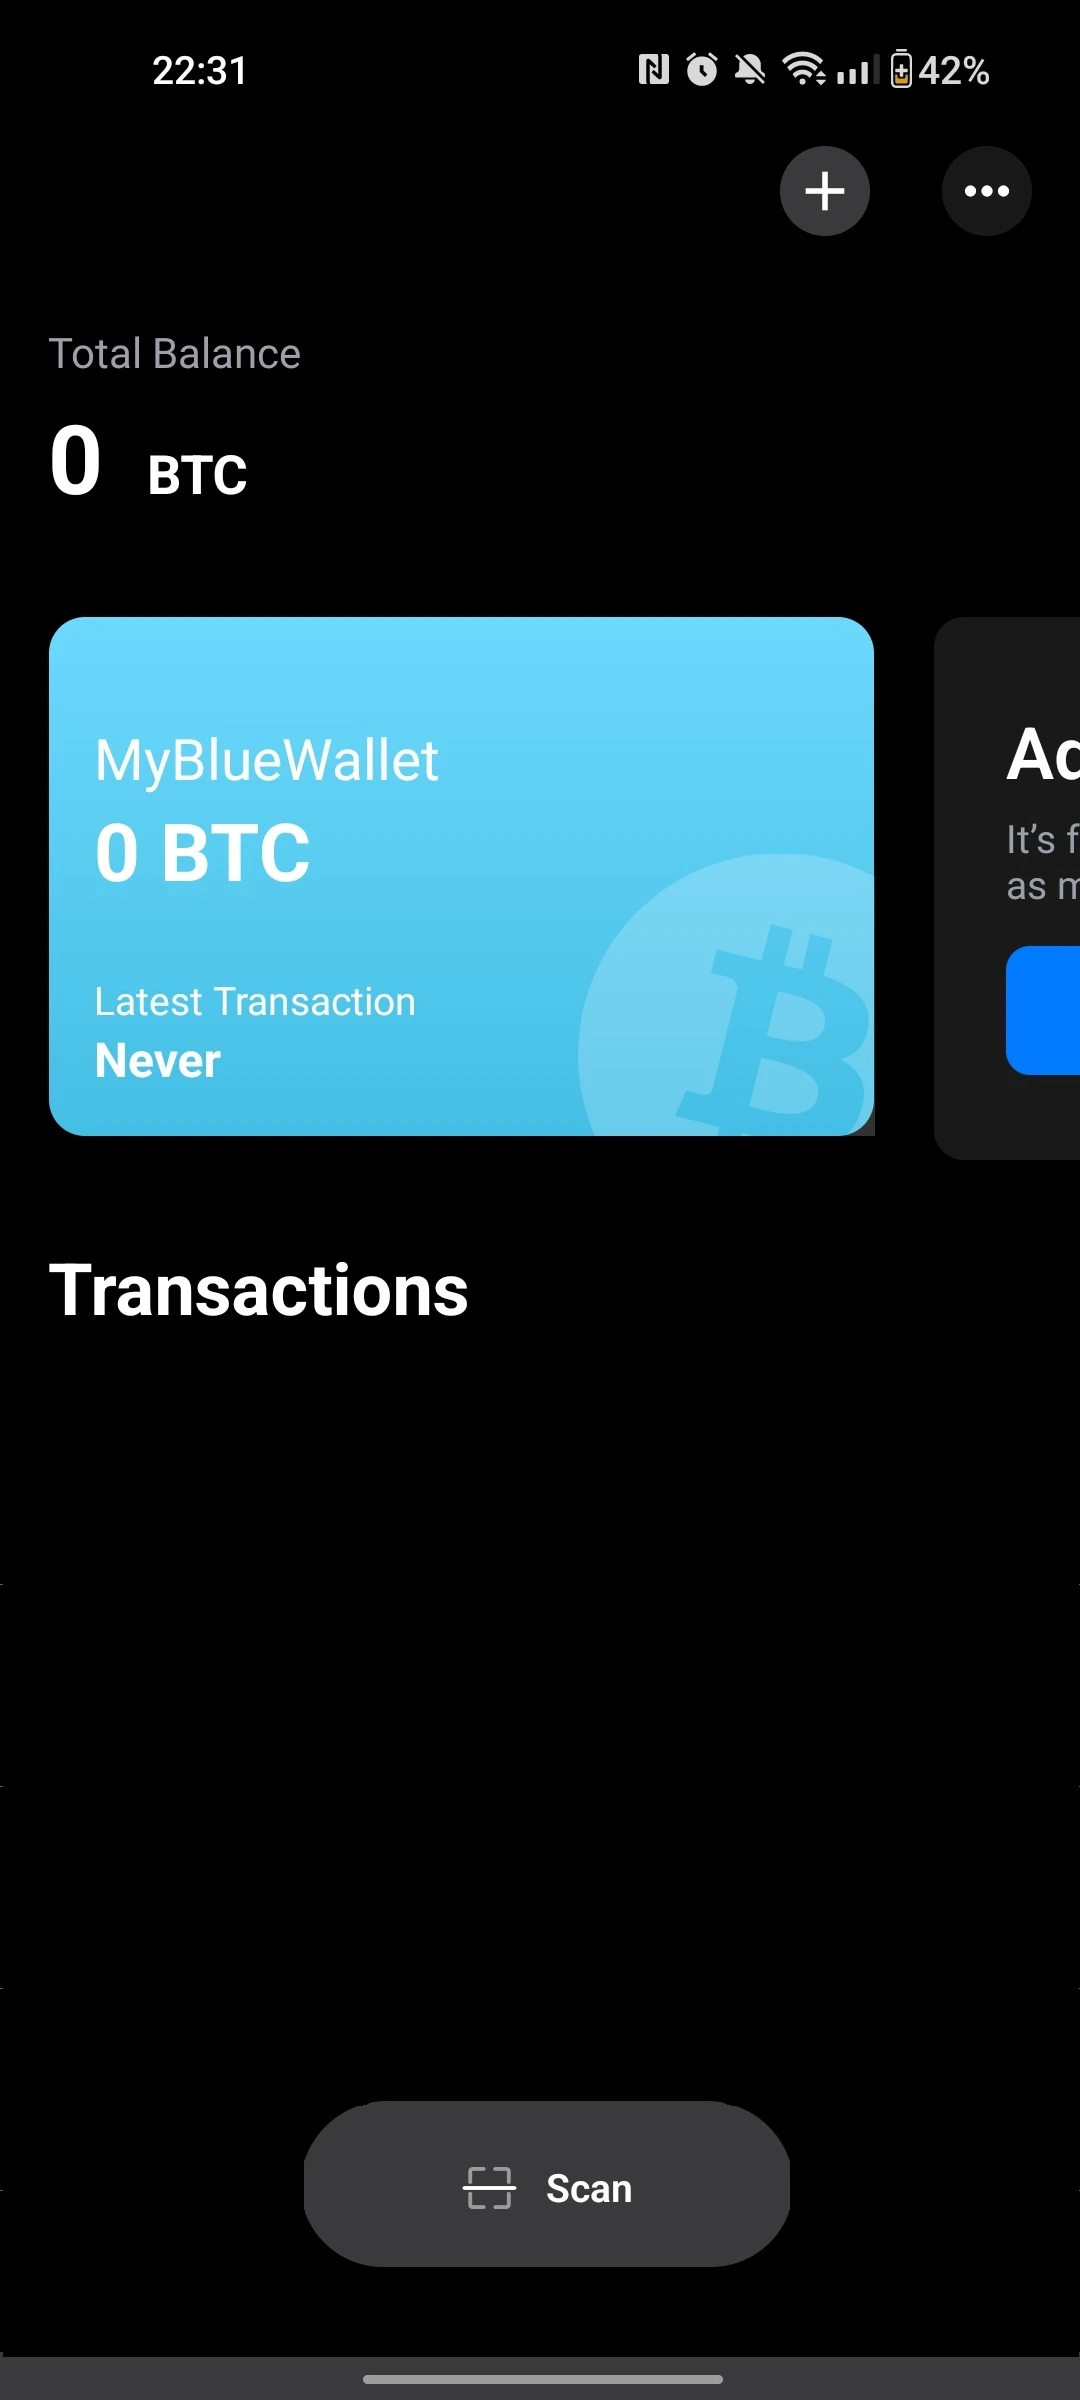
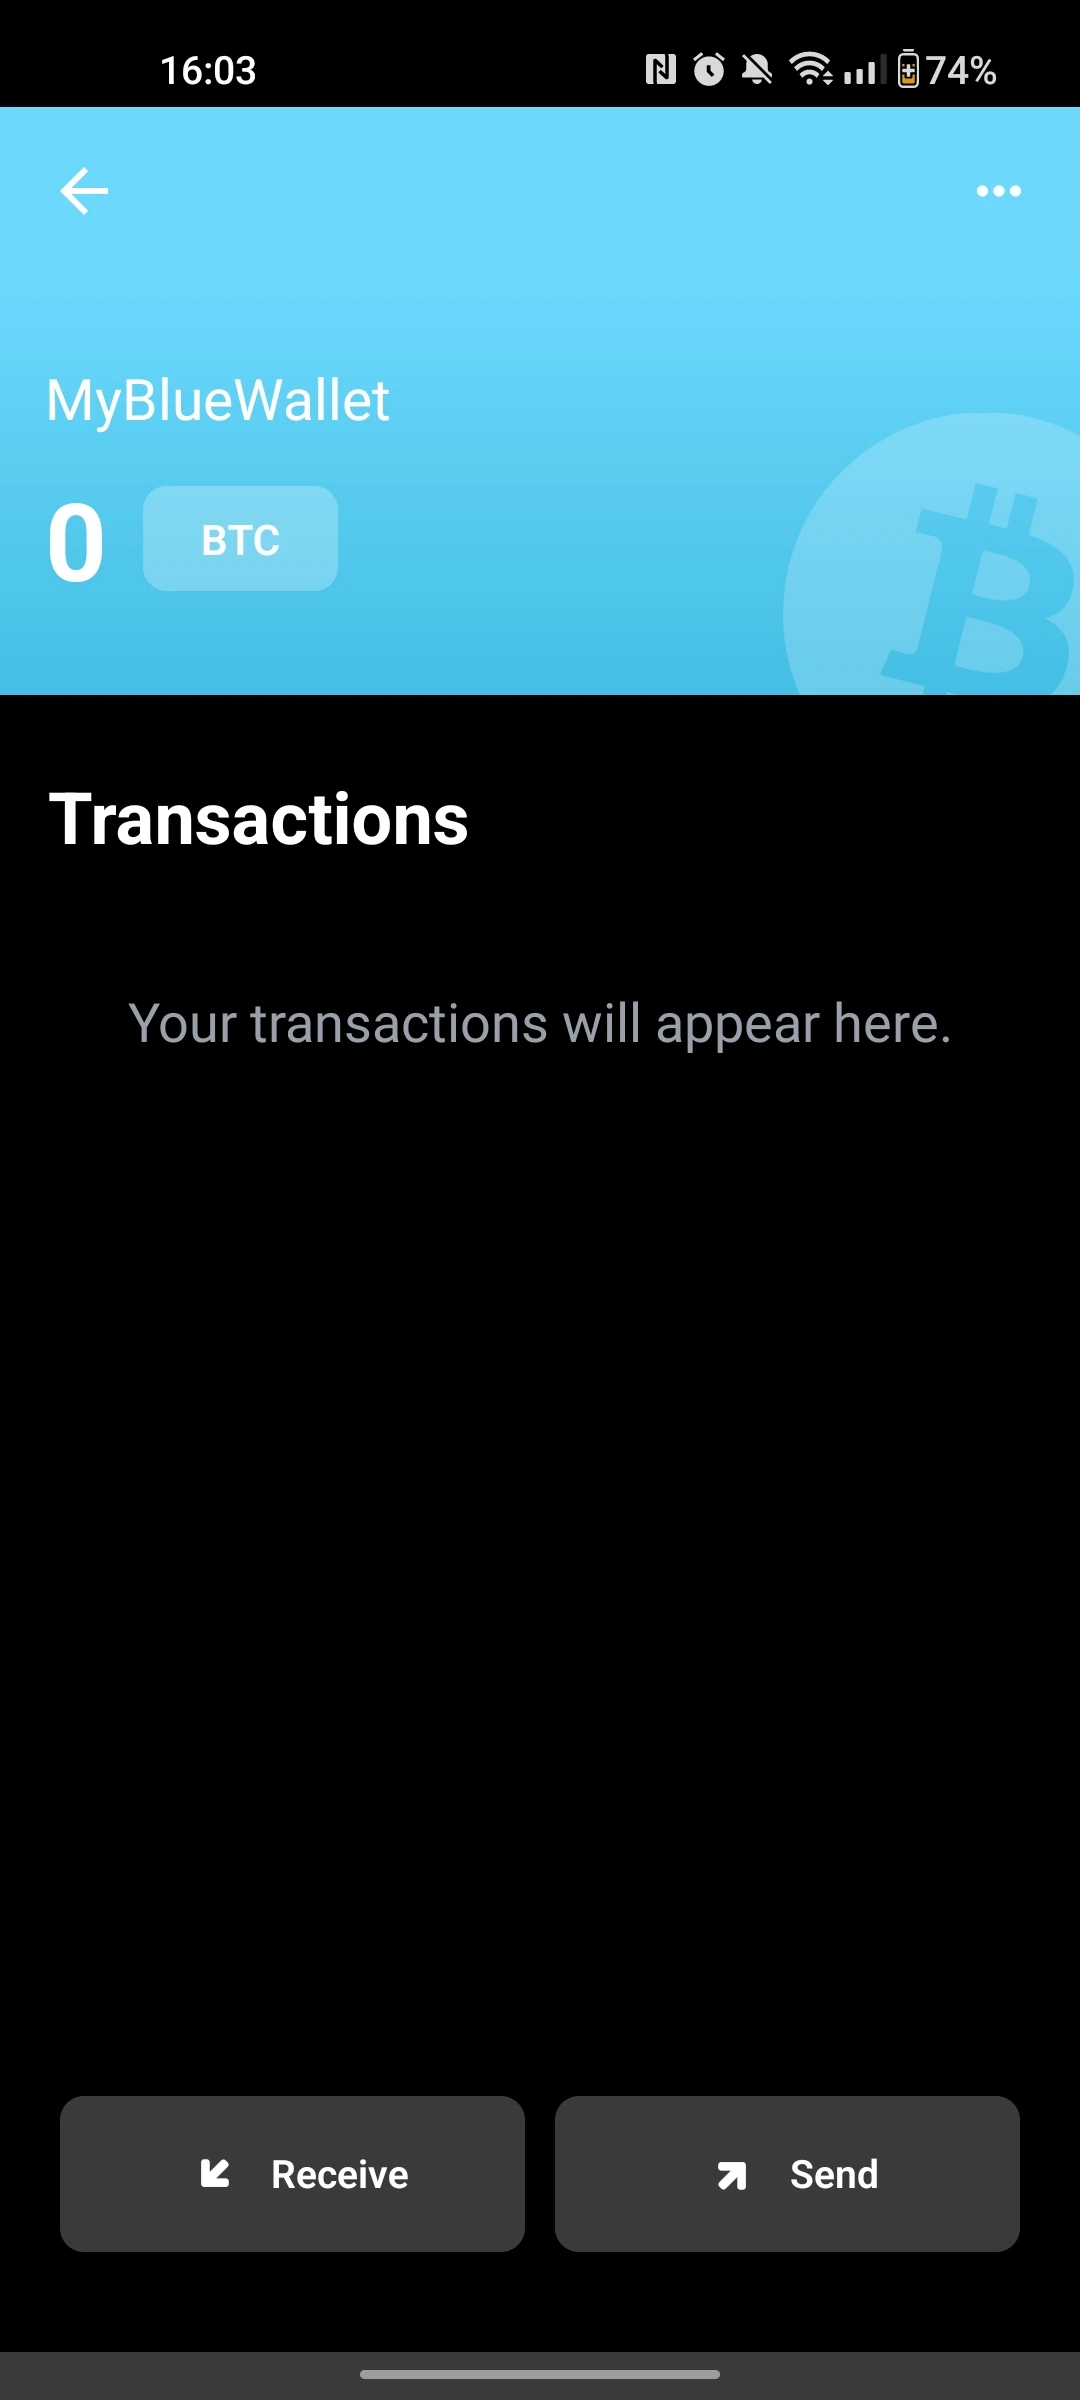
Go to BlueWallet → Click MyBlueWallet card → Click Receive. You'll see a QR code and a Bitcoin address that starts with "bc1q...". Click the address to copy it.
2. Configure automatic transfers
In 21Bitcoin:
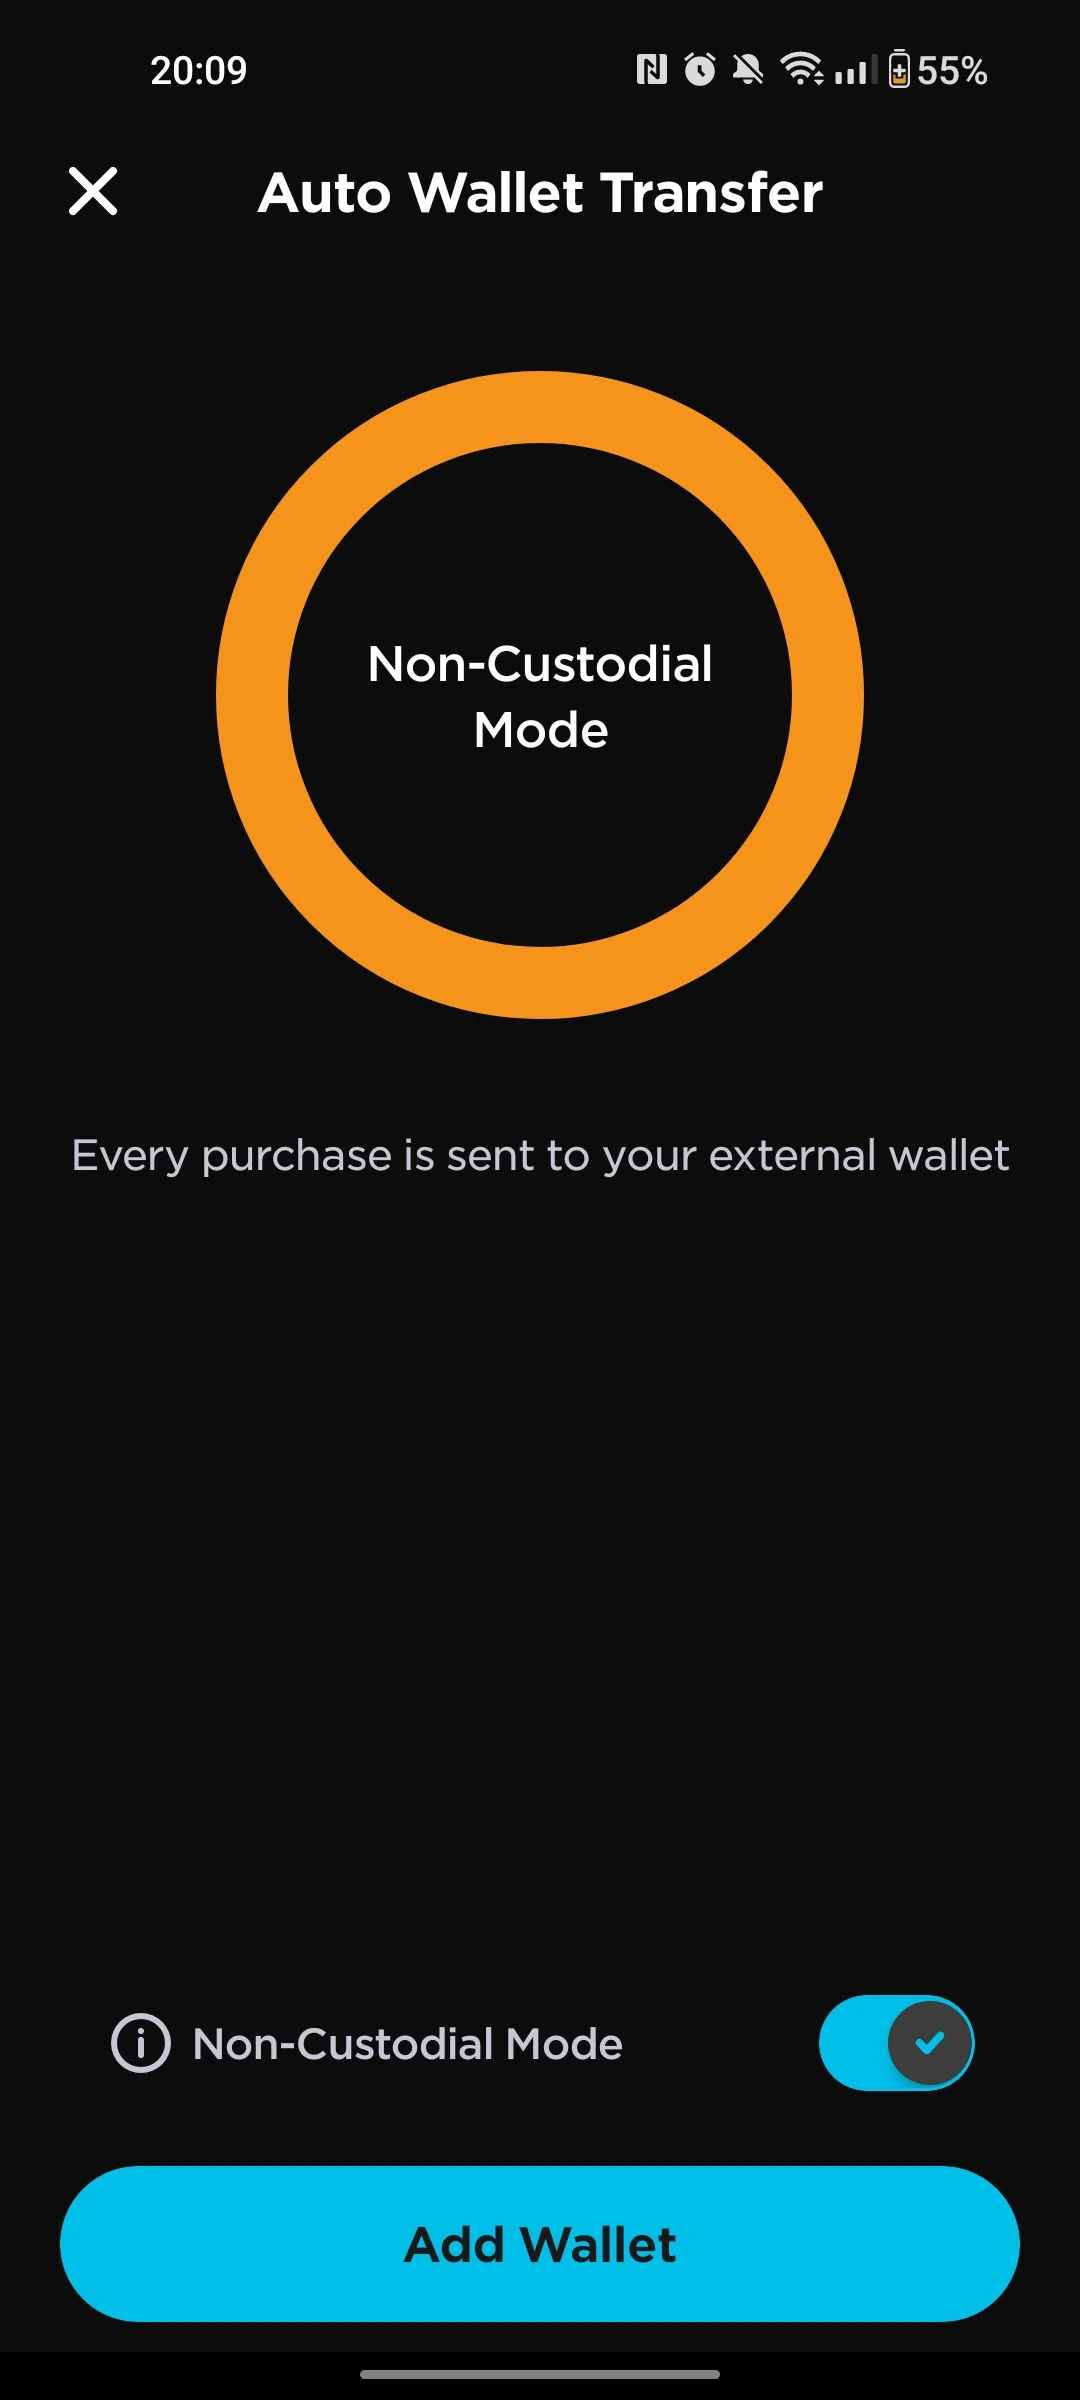
- Go to Bitcoin → Auto Transfer
- Choose Non-Custodial mode (or Set a balance limit)*
- Click Add Wallet → Select Private Wallet
- Name it "MyBlueWallet" and paste your copied address
- Select 2FA signature to verify ownership**
- Use your fingerprint or Face ID to verify ownership
- Confirm the wallet address matches (check the last few characters)
- Select the external wallet you added
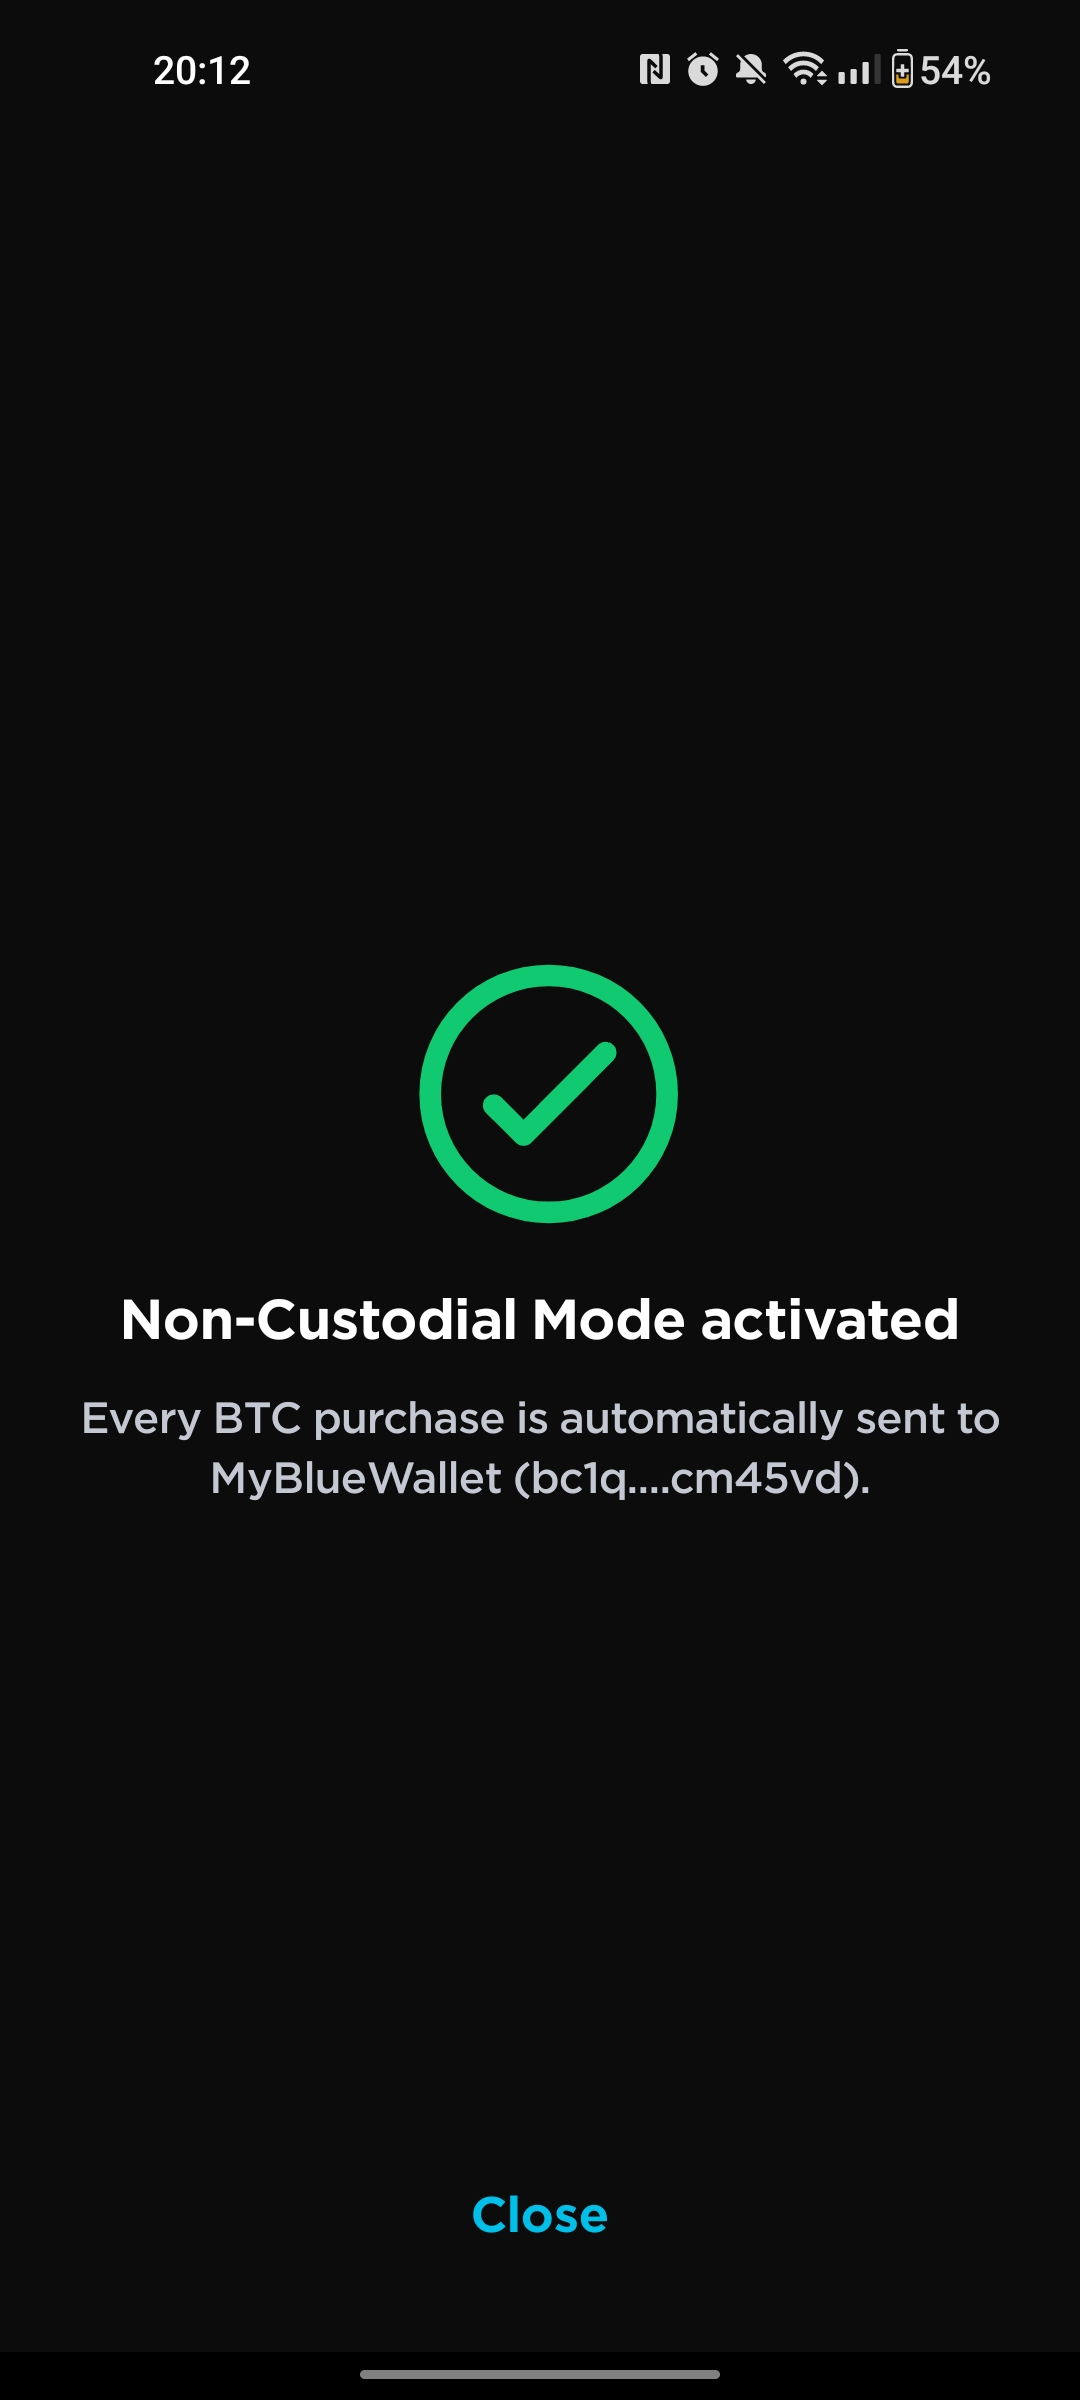
- Done! Your wallet is now verified and ready for automatic transfers
Use this information to set up automatic Bitcoin purchases from your bank account to 21Bitcoin. Your sats will automatically transfer to your BlueWallet after each purchase.
* Automatic transfer options:
- Non-Custodial mode: Every purchase is automatically sent to your wallet
- Balance limit: Transfers occur when your exchange balance reaches a certain amount
** Alternative verification method: 21Bitcoin also offers digital signature verification if 2FA isn't available on your device. Follow the same process explained inside the Relai tab on section 3.
Transfer Fee Consideration: Each transfer costs 1000 sats (roughly 1€). With non-custodial mode, you pay this fee for every purchase. With a balance limit, you can set a higher threshold (like 300-500€) to reduce transfer frequency while maintaining automatic custody.
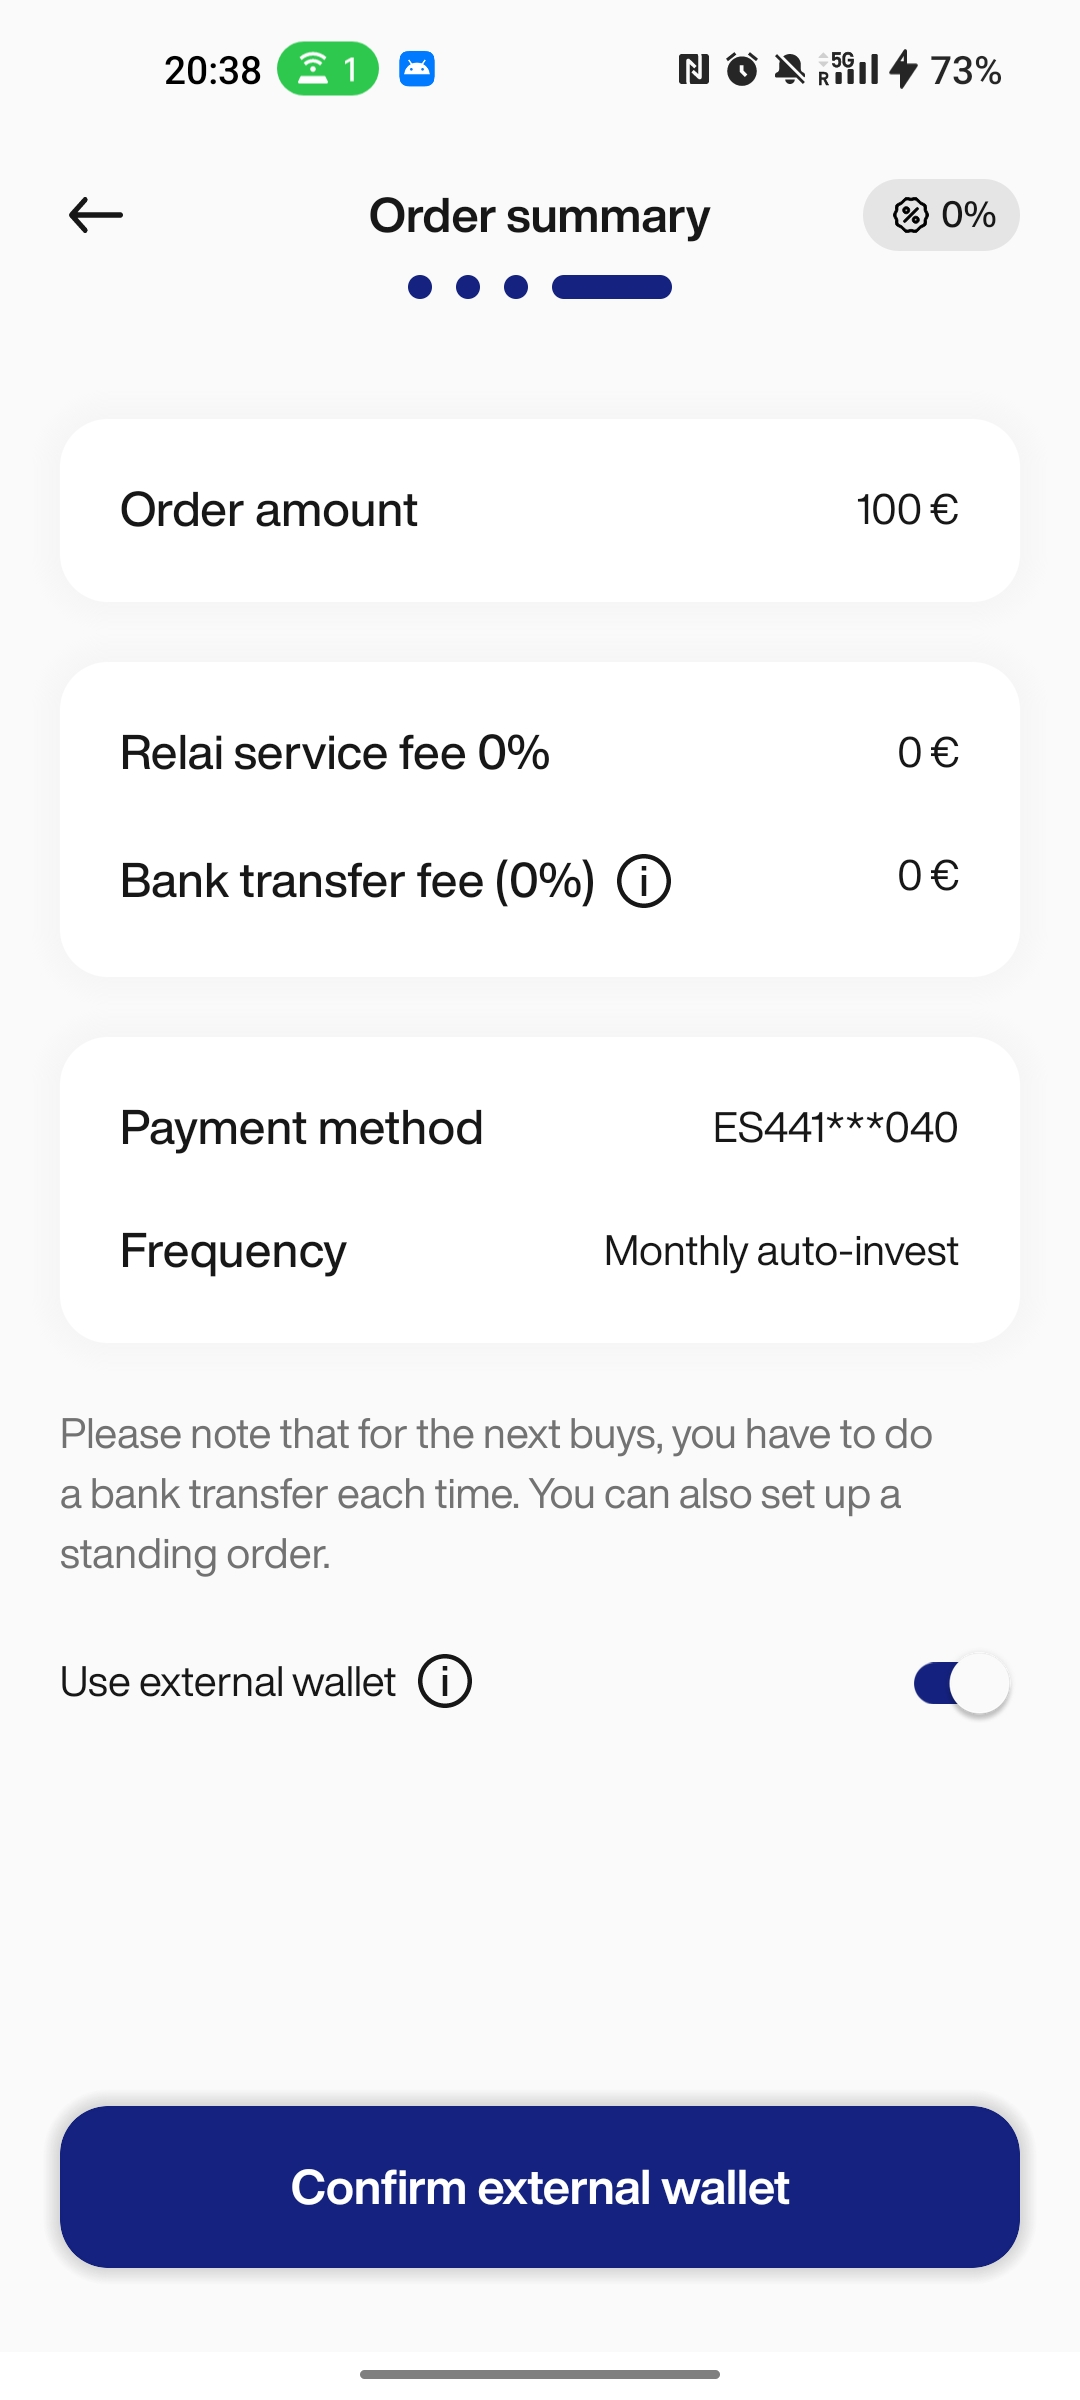
In Relai:
- Click Buy
- Select amount
- Select weekly auto-invest or Monthly auto-invest
- Select Payment Method
- In the order summary, toggle Use external wallet and click Confirm external wallet
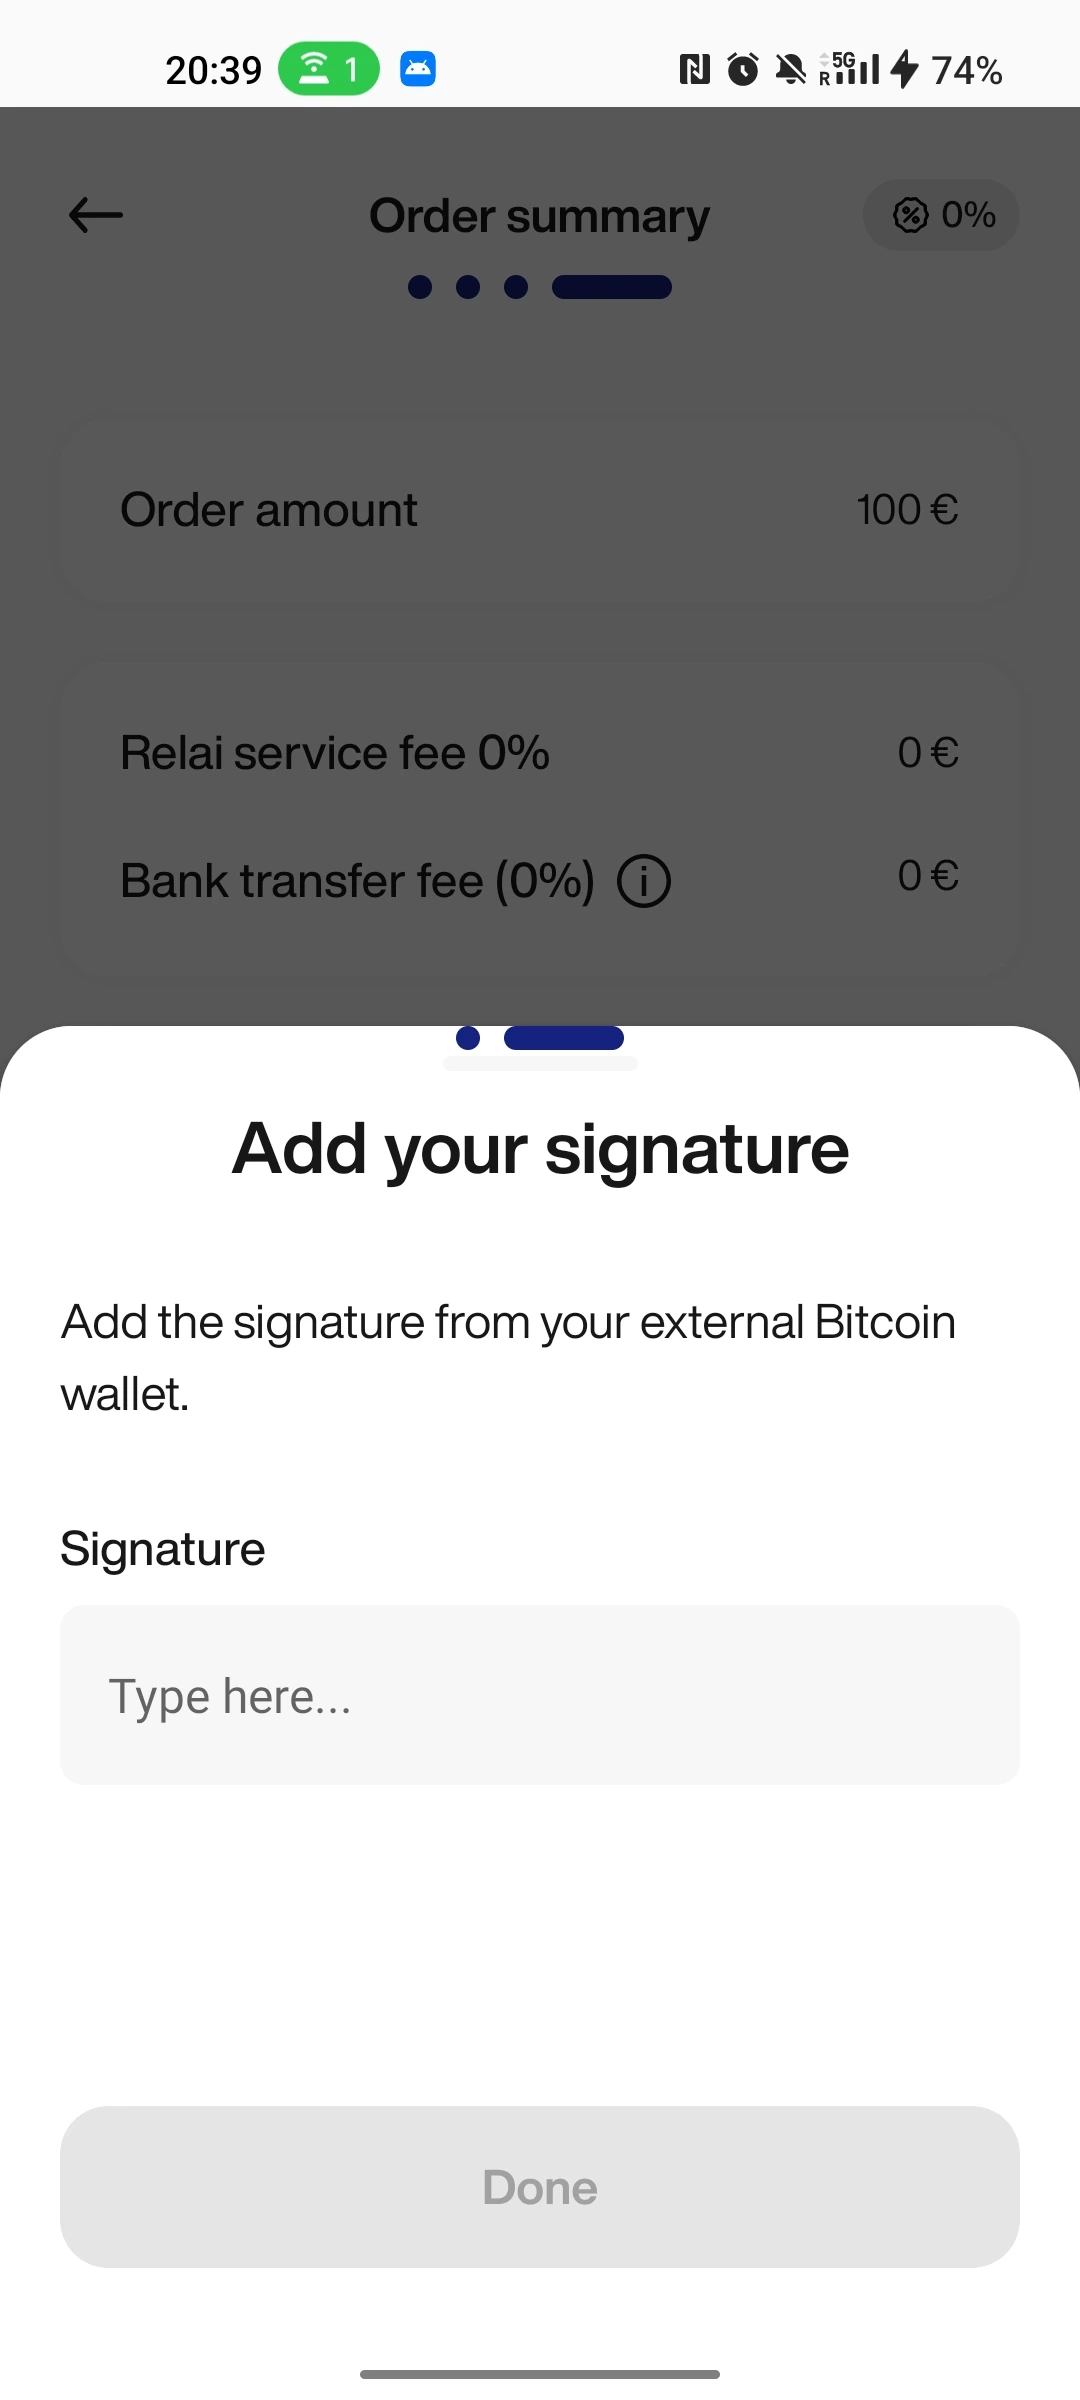
- Add external Wallet → Add manually → Paste your BlueWallet address
- Copy the verification message provided by Relai
Relai requires you to verify that the wallet address belongs to you using a digital signature.
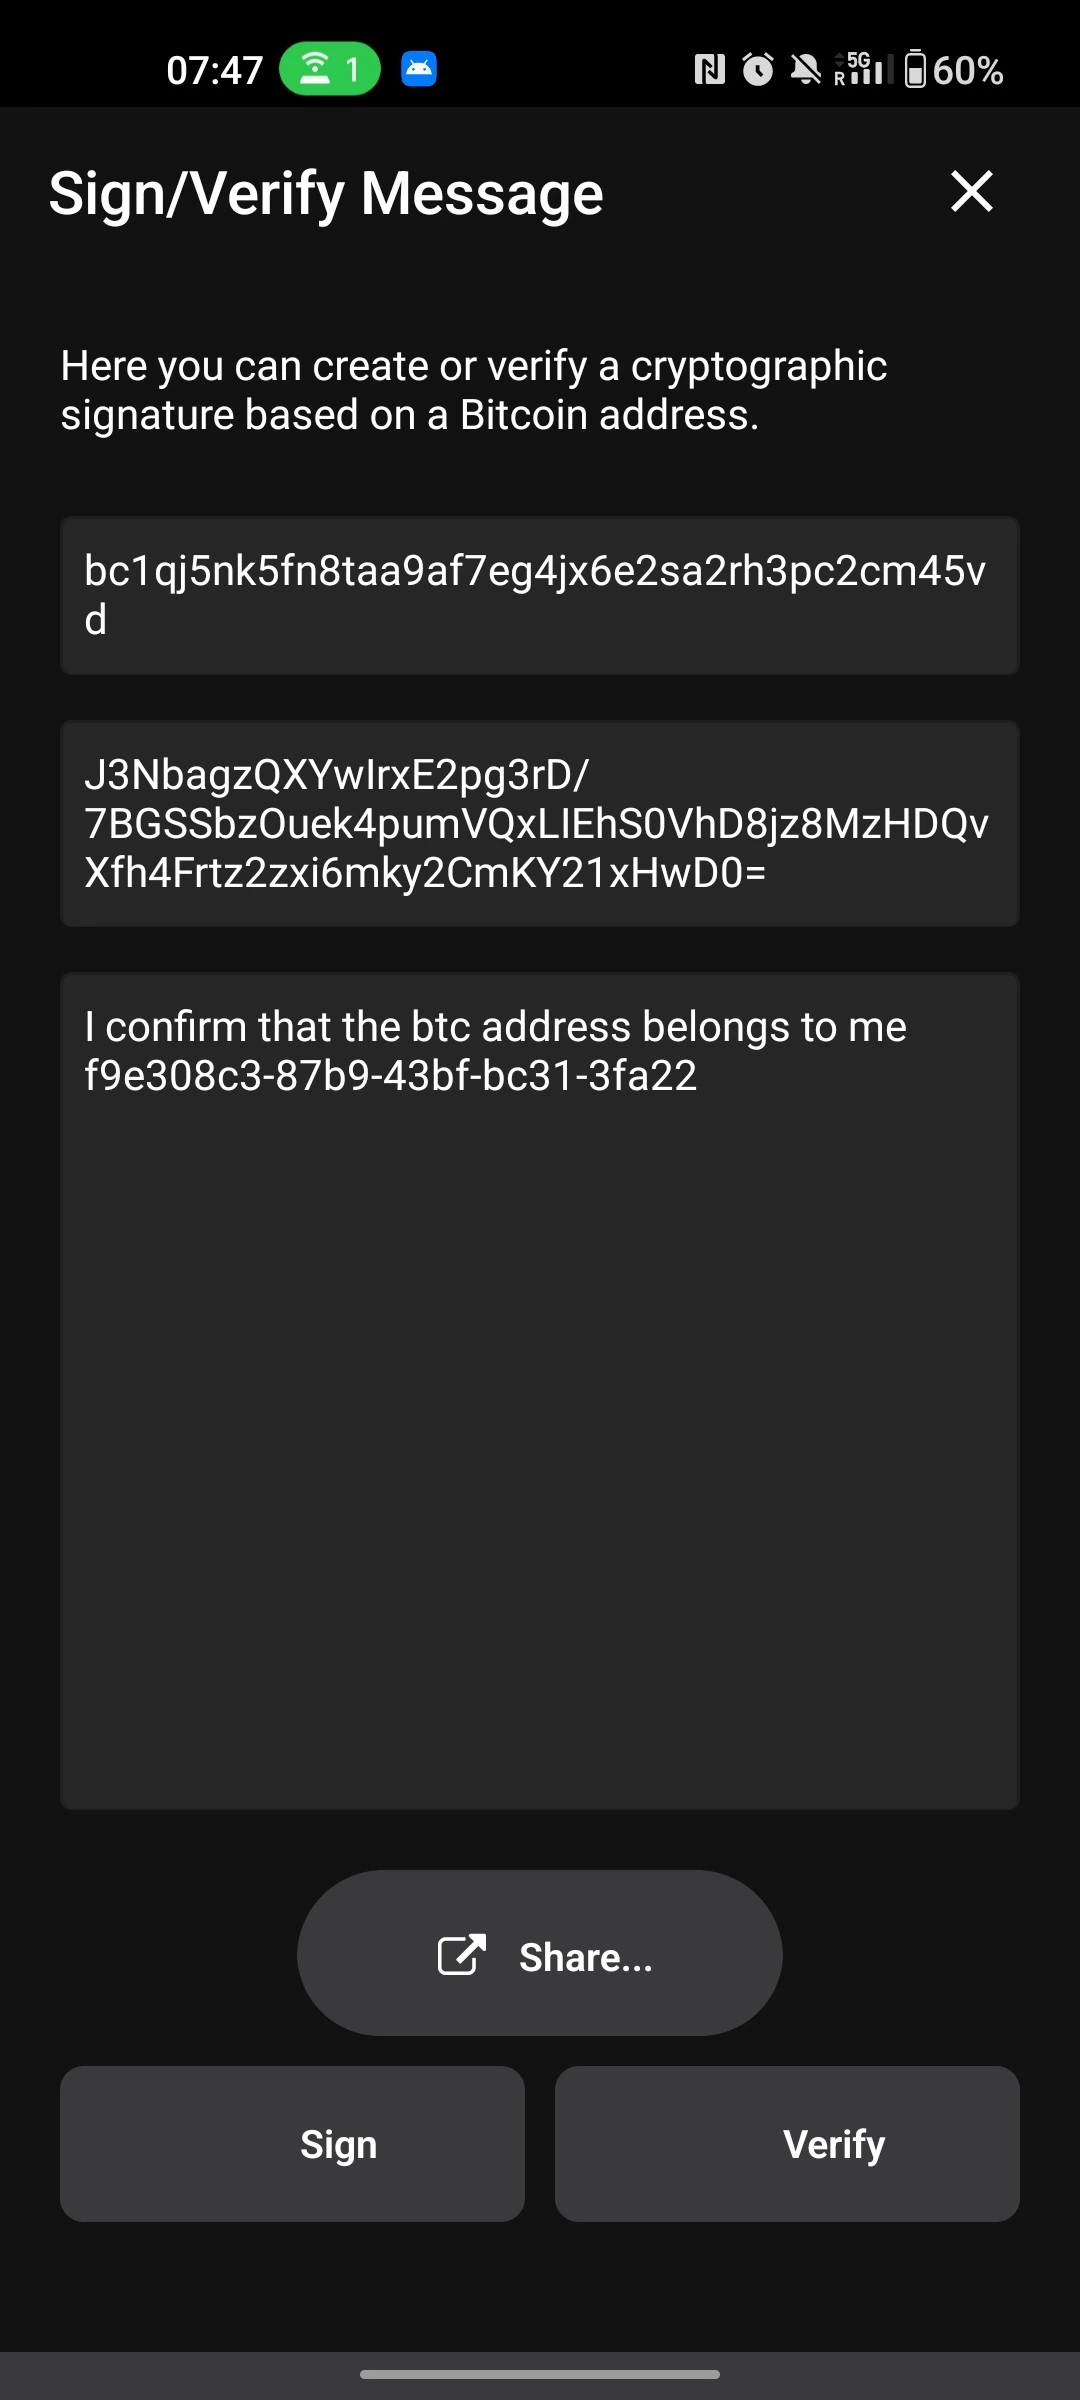
- Go back to BlueWallet → MyBlueWallet
- Click the three dots at the top right
- Select Sign/Verify Message at the bottom
- The Address field should already be filled with your wallet address
- Paste the verification message into the Message field
- Click Sign
- Copy the signature that appears
- Return to Relai and paste the signature to complete verification
- Click Done → Click Buy Now
- Copy the Payment details to your bank account → Click Done


In Relai, use the information in Payment details to set up automatic Bitcoin purchases from your bank account to Relai. Your sats will automatically transfer to your BlueWallet after each purchase.
Using Your Bitcoin
Once your sats are in BlueWallet, you can send Bitcoin to others using the Send button. Enter the recipient's bitcoin address or scan their QR code, and adjust transaction fees (pay more for faster confirmation, or less if you can wait). Every transaction appears on the mempool, where you can see your transaction's status and current network fees in real-time.
⚠️ Important: Before sending Bitcoin, always double-check that the last 5 characters of the address match what you copied. If you send to the wrong address, your Bitcoin is gone!
That's it! You're now set up to buy and store sats 🚀

Next Steps
Once you’re comfortable buying sats and your balance starts to grow, the next step is learning how to secure your Bitcoin properly. Continue with BTC 103: Cold Storage, where we’ll cover when cold storage makes sense and how to protect your Bitcoin from hacks, theft, and custodial risk.